
Build a checklist template
Create a recurring checklist: its tasks, how often it's due, who fills it in and who signs it off.
A checklist template is the list your team works from: the tasks, how often they’re due, who fills them in and who signs them off. Each time it’s due, each assignee gets their own copy to tick off, and every copy is kept, so you have a record of who did what and when.
Create a template
Section titled “Create a template”-
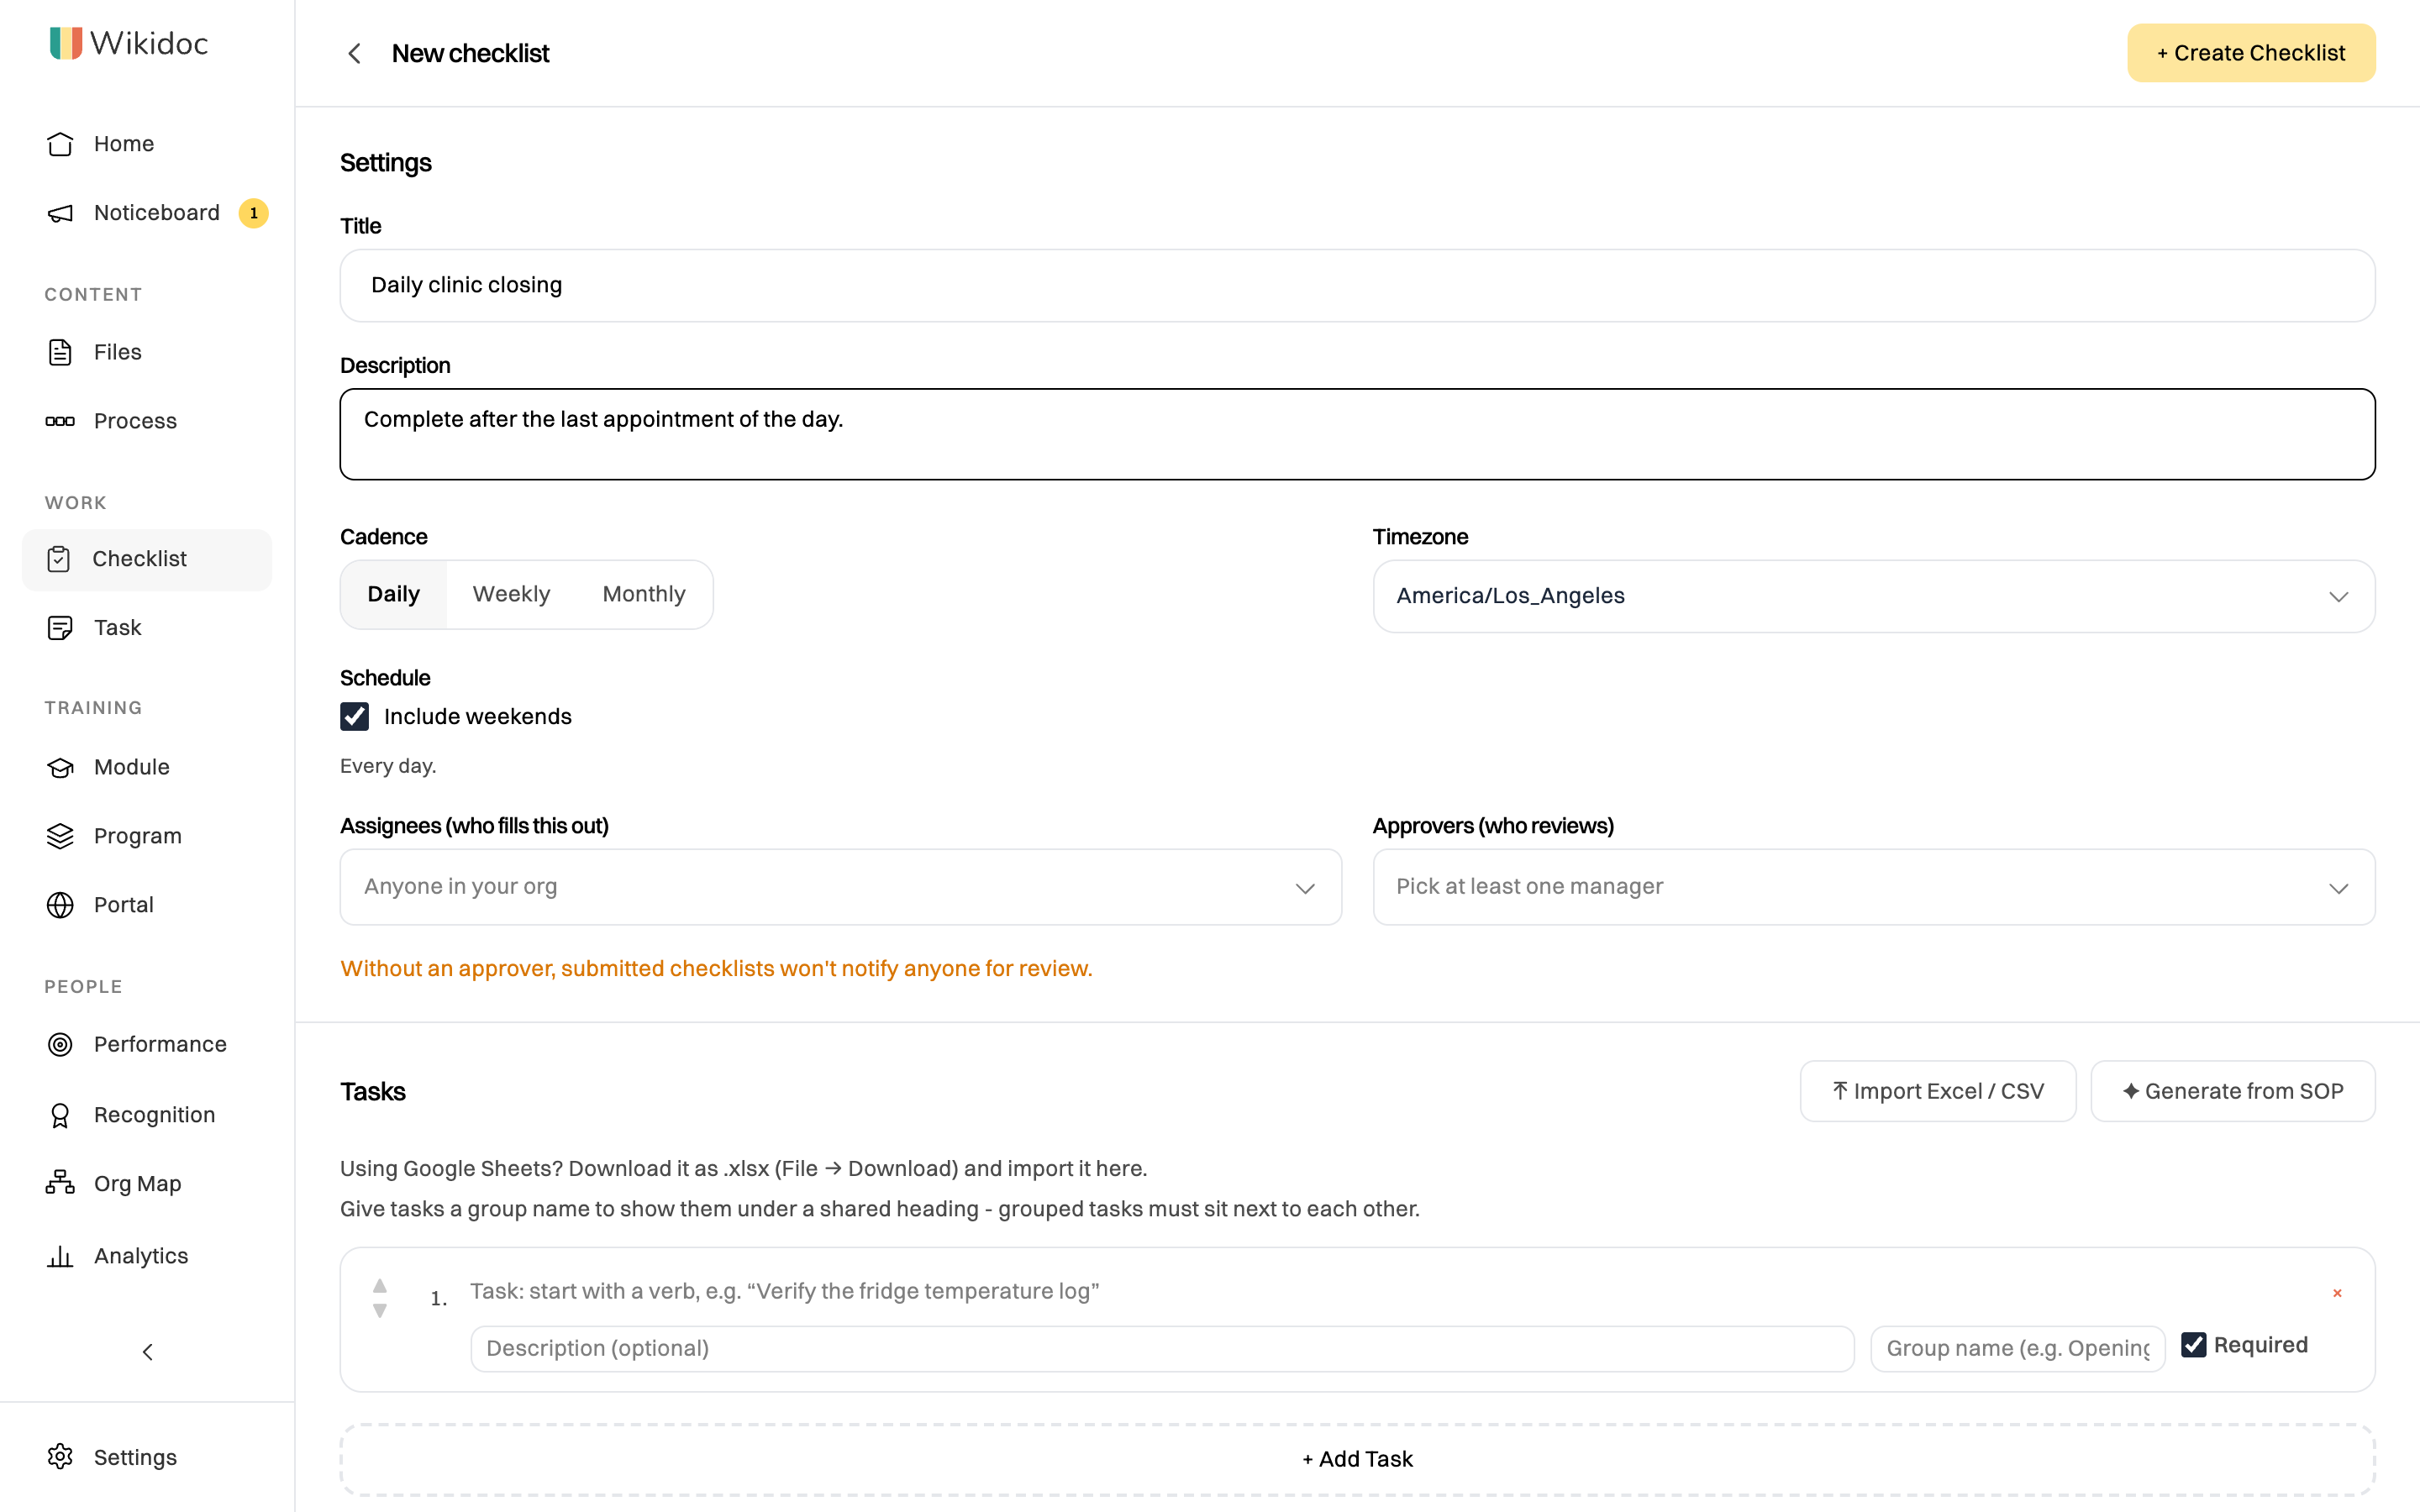
Click Checklist in the sidebar, then + New checklist.
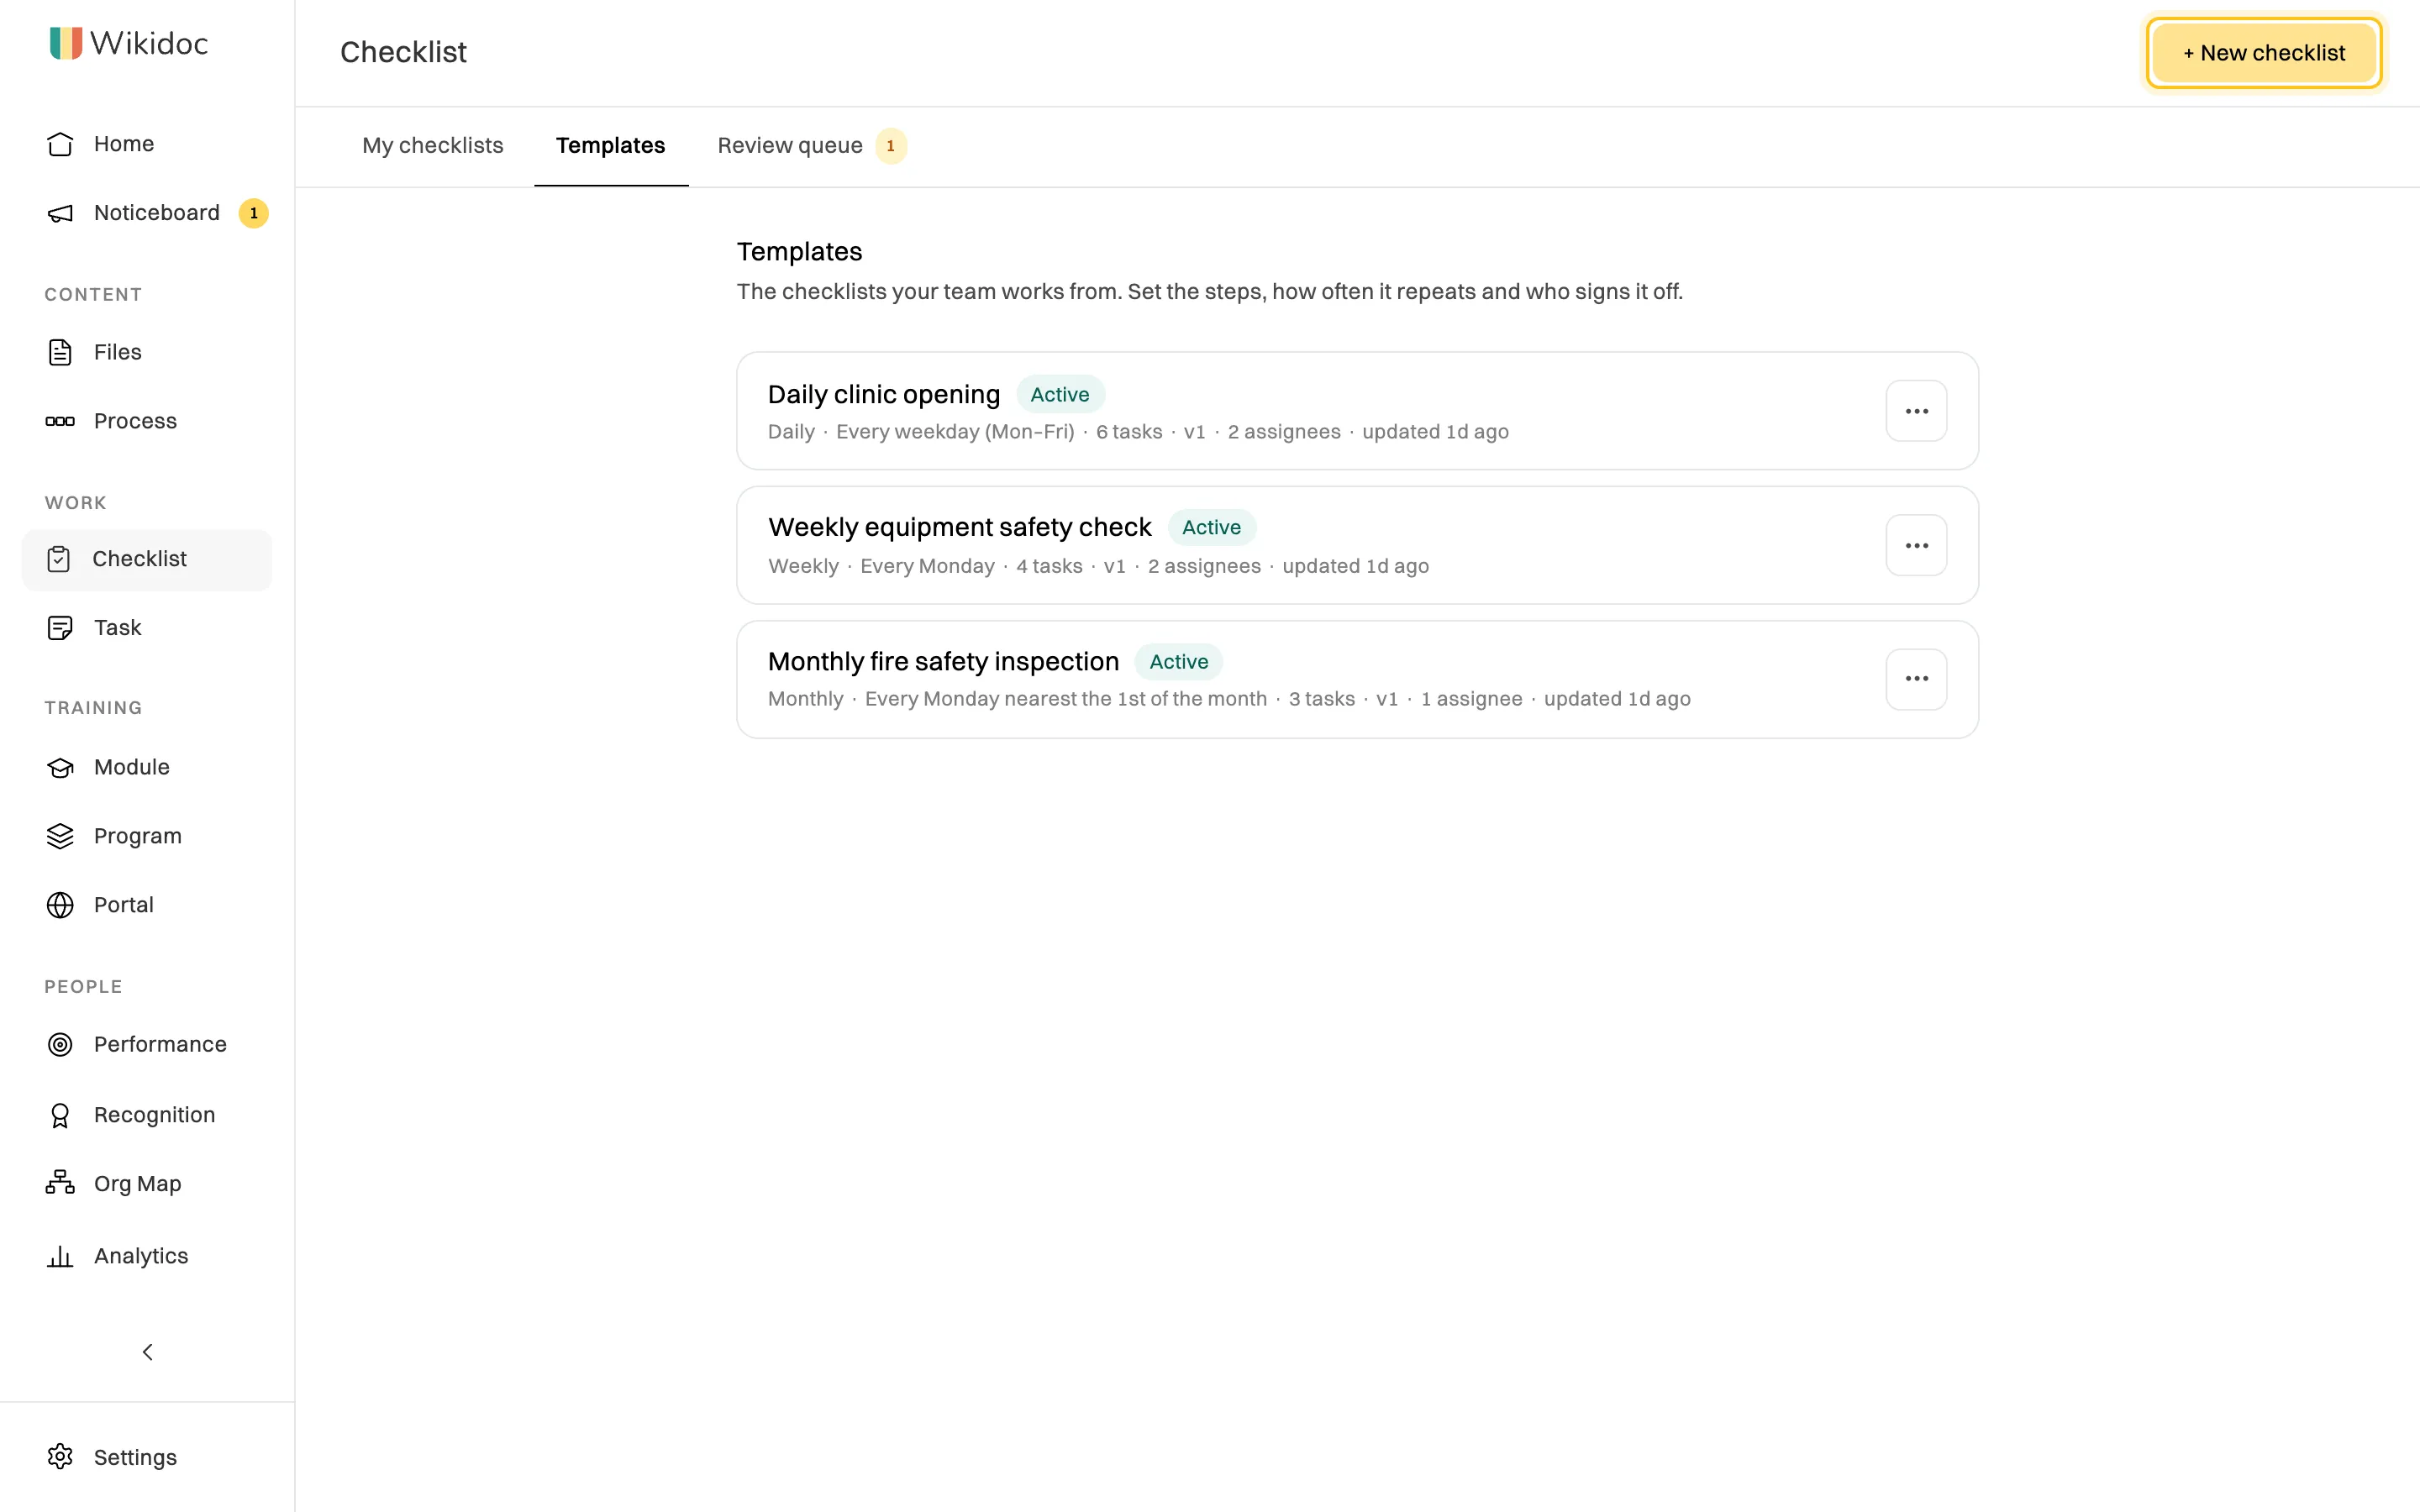
The Templates tab lists every checklist your organization runs. -
Give it a Title, and a Description that says when to complete it.
-
Choose a Cadence, then set the Schedule:
- Daily: every day. Clear Include weekends for weekdays only.
- Weekly: pick any date in the calendar, and it’s due on that weekday every week. Leave it unpicked and it’s due by the end of each week.
- Monthly: pick a date, and it’s due on that weekday nearest that day each month, for example Every Monday nearest the 1st of the month. Leave it unpicked and it’s due by the end of each month.
-
Check the Timezone. Days start and end in this timezone, so a daily checklist resets at midnight there.
-
Choose the Assignees, the people who fill it in. Leave it empty and anyone in your organization can fill it in. Viewers can be assignees.
-
Choose the Approvers, the people who review and sign it off, usually a manager. Without one, nobody is told when a checklist is submitted.
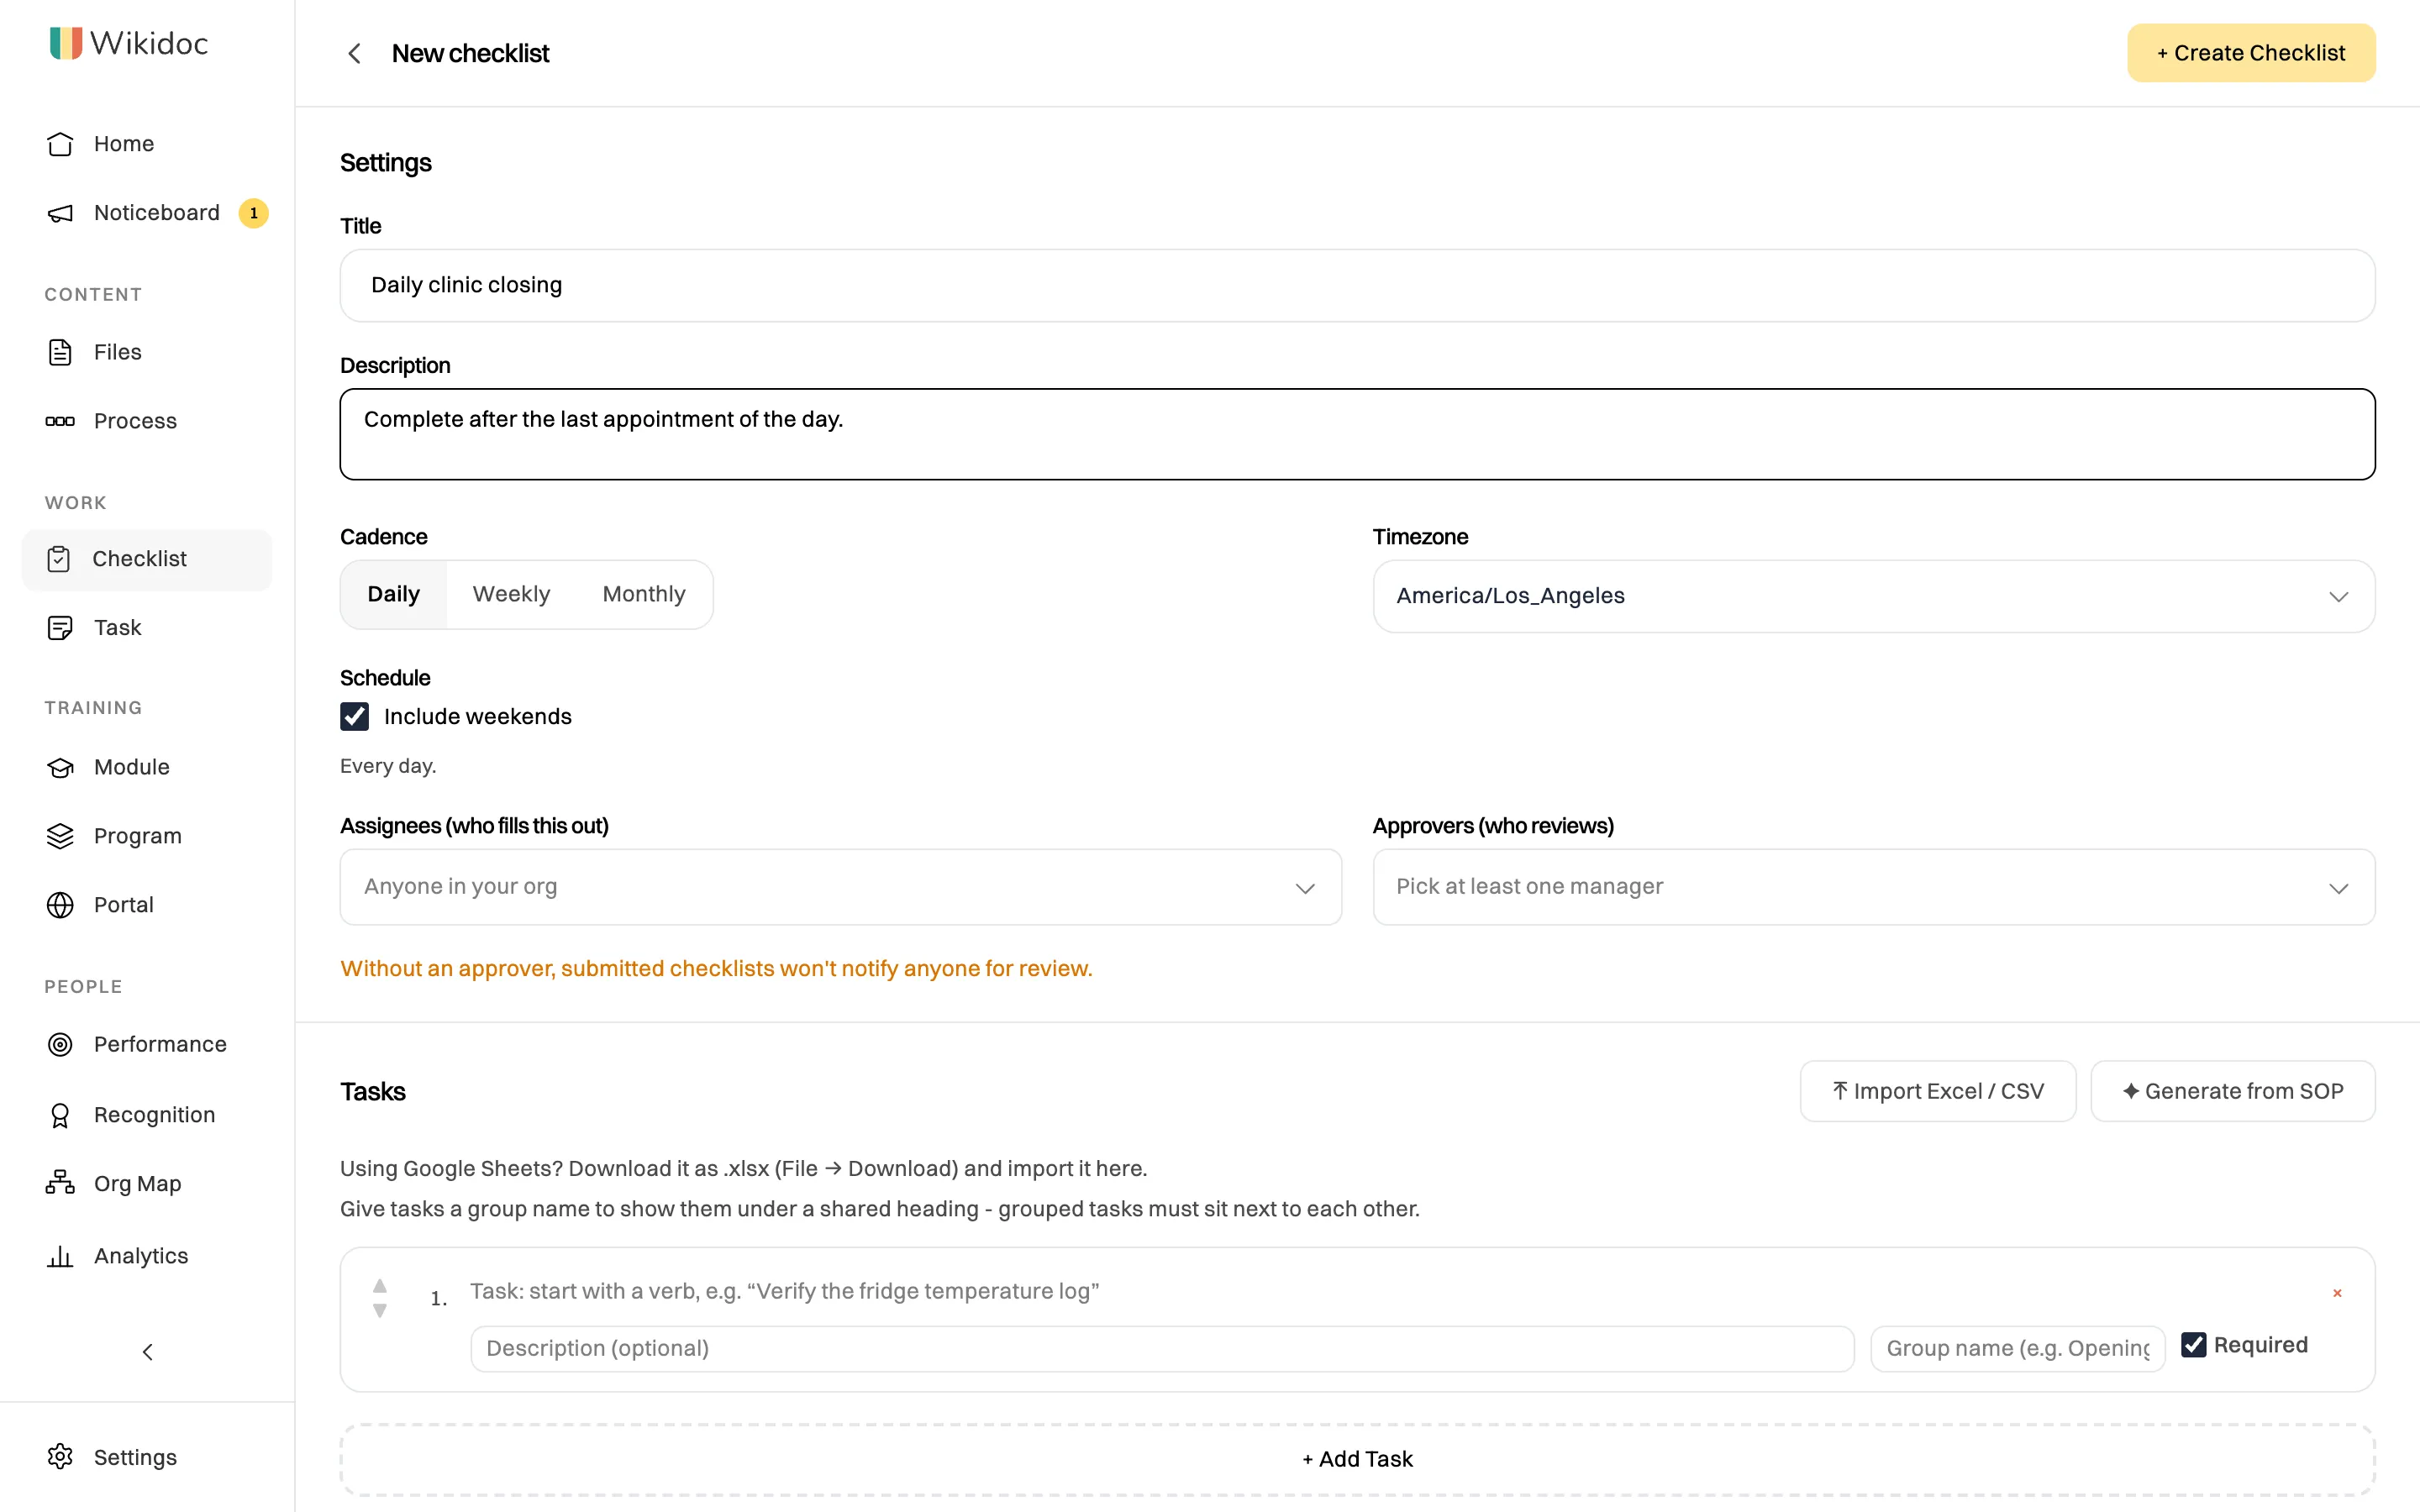
Settings decide when the checklist is due and who's involved. -
Under Tasks, type the first task. Start with a verb: “Record the fridge temperature”. Click + Add Task for each one after that.
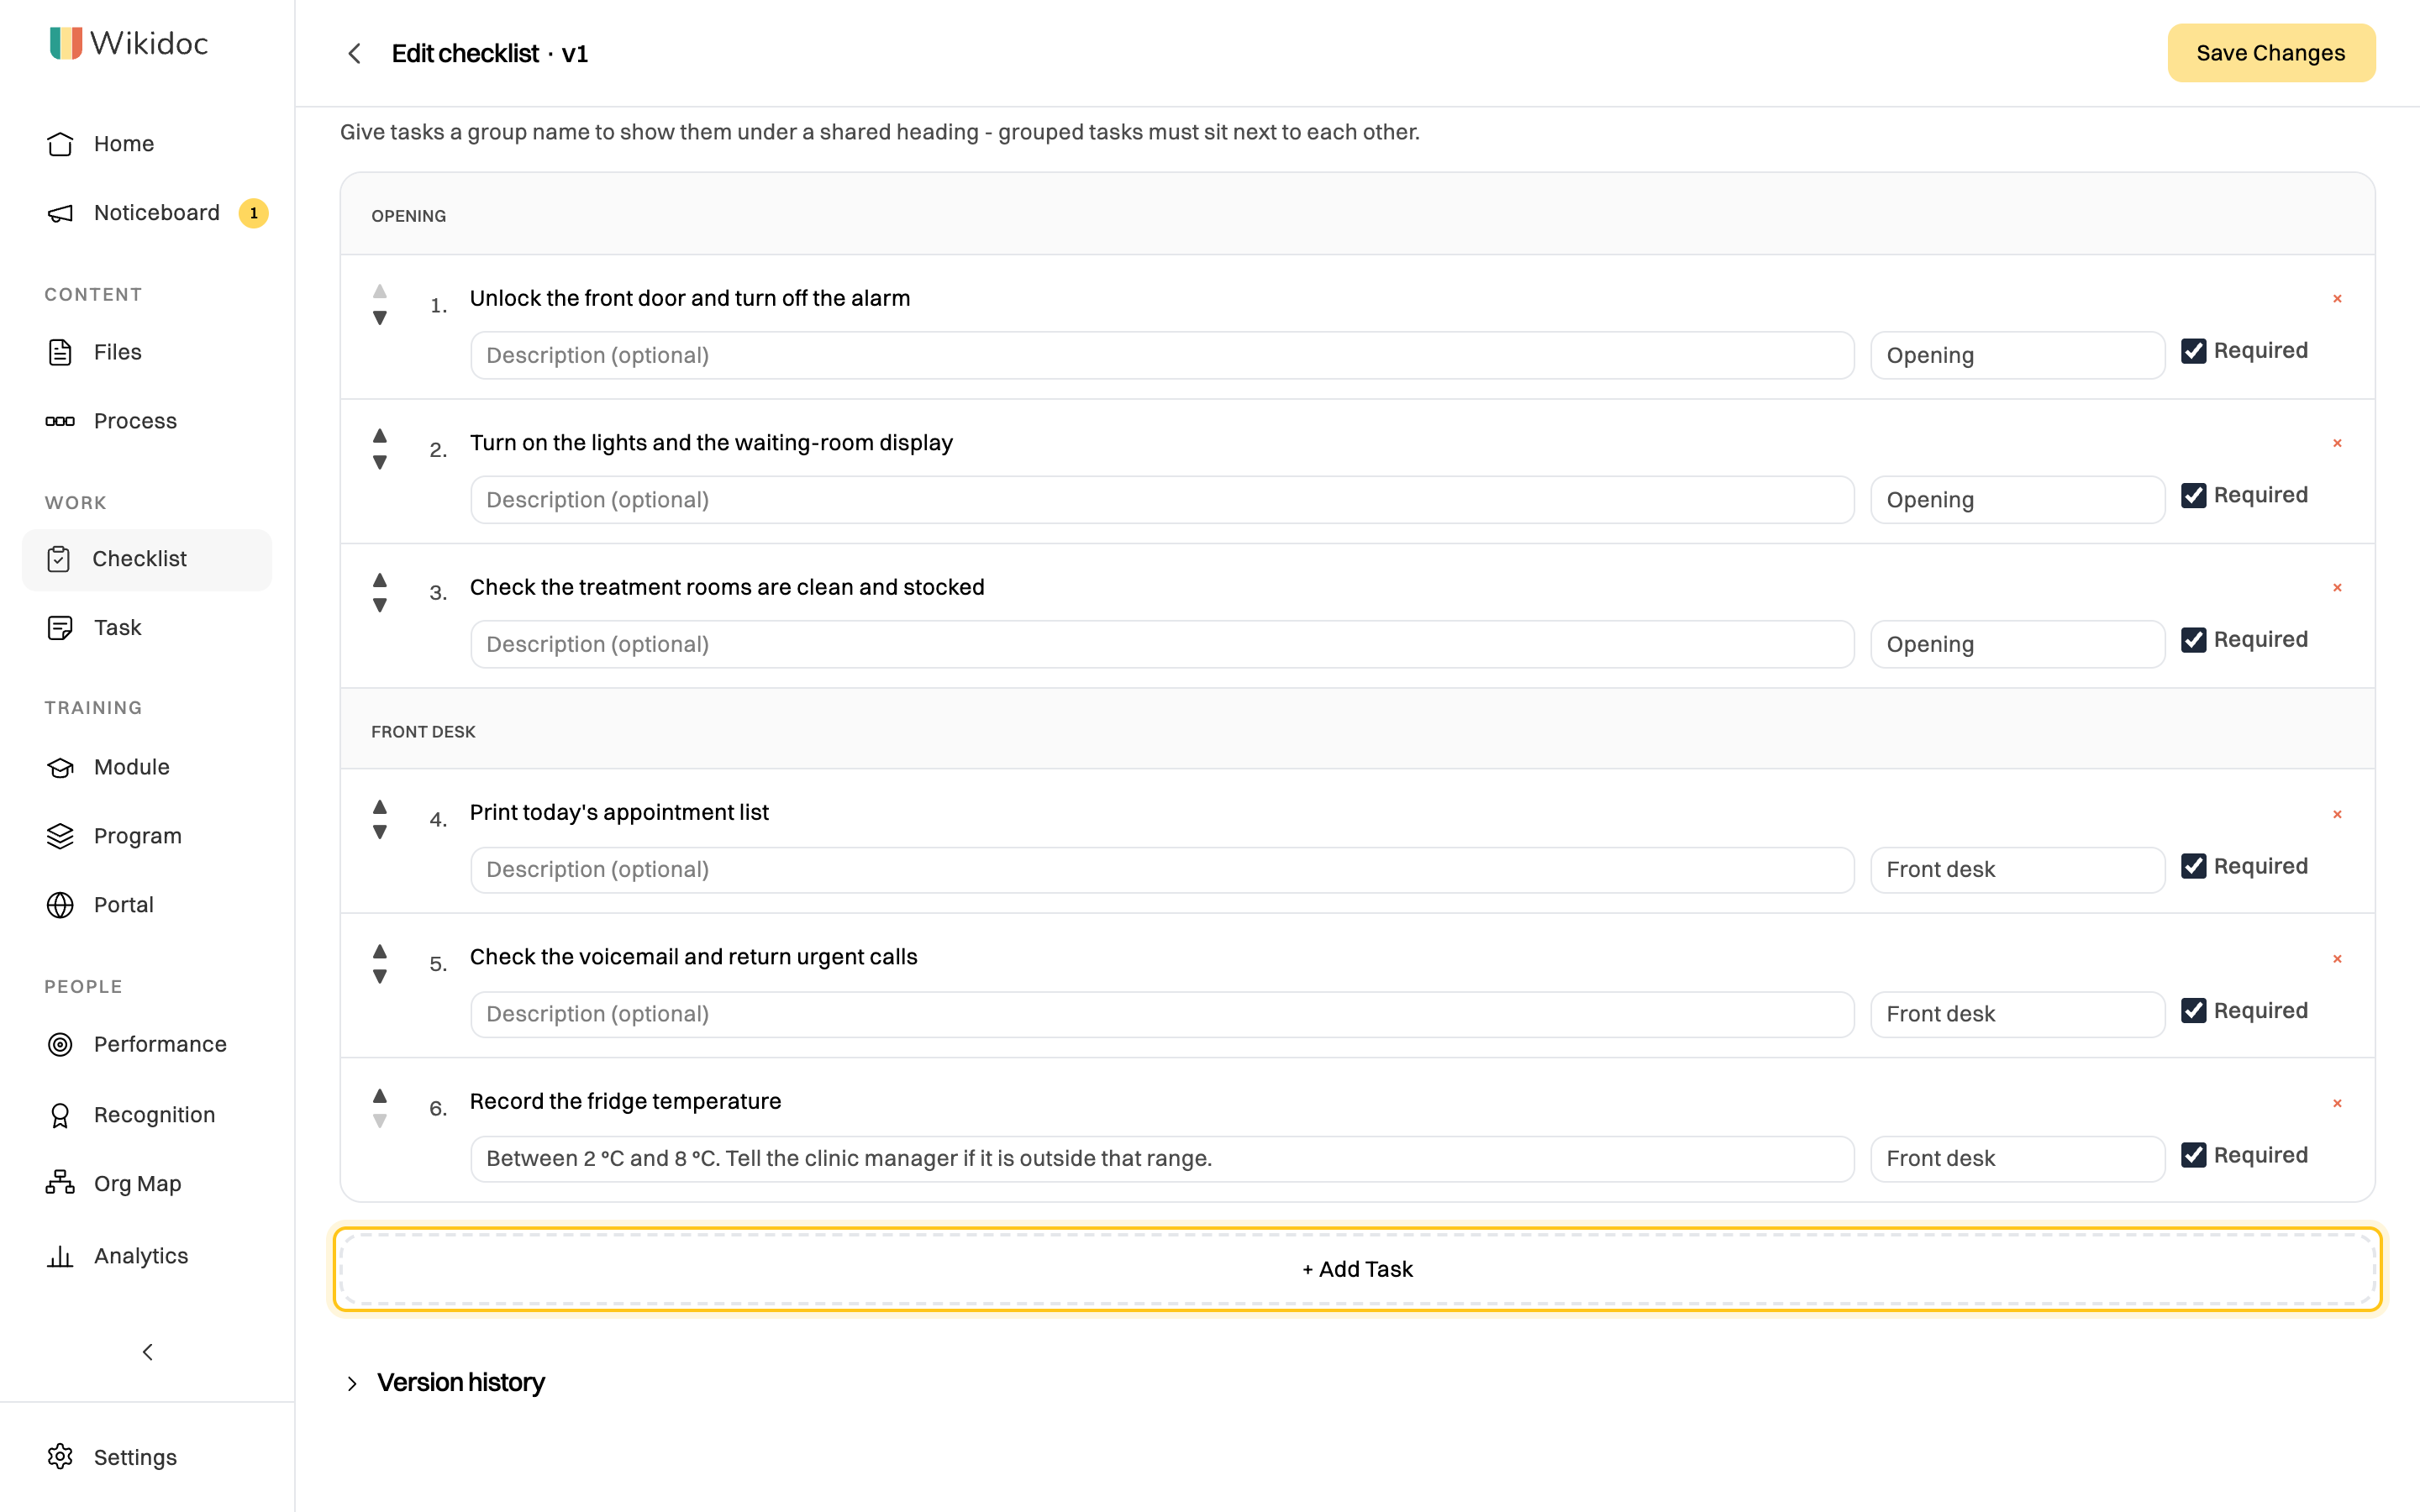
For each task you can add:
- a Description with the detail someone needs to do it;
- a Group name, to show tasks under a shared heading such as “Opening”. Keep grouped tasks next to each other;
- Required, ticked unless the task is optional.
Use the arrows to reorder tasks, and × to remove one.
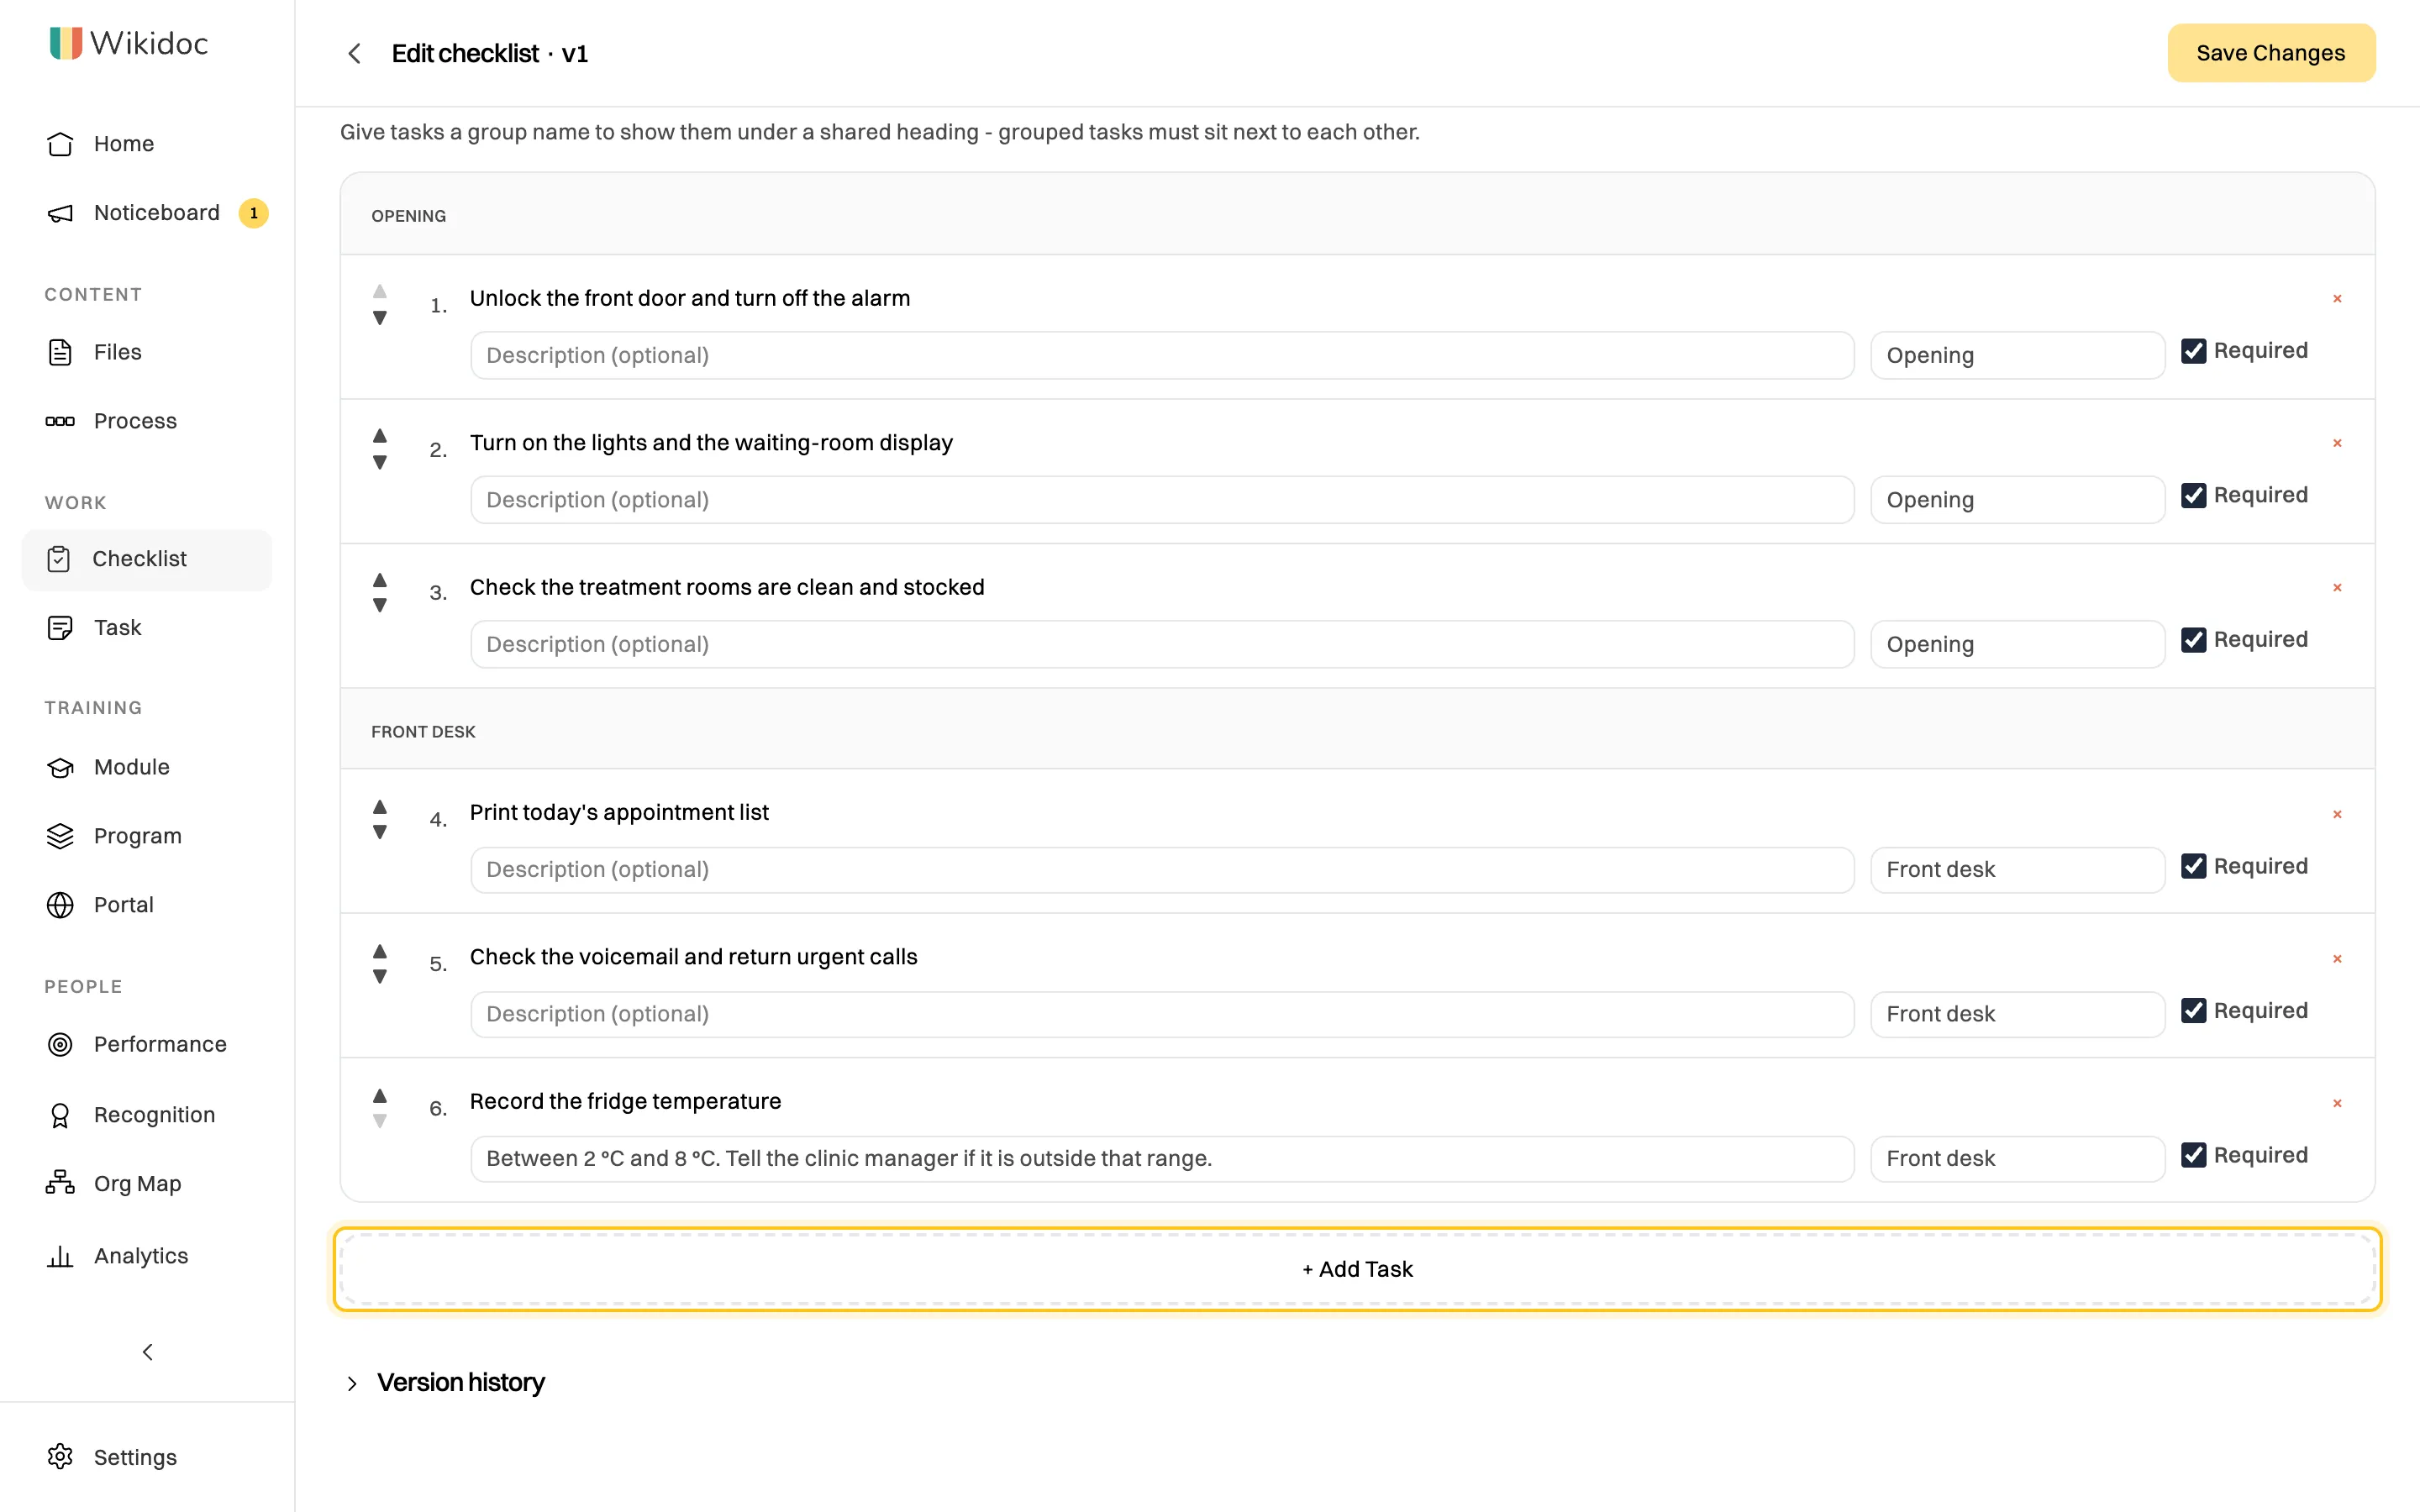
Group names become headings on the checklist your team fills in. -
Click + Create Checklist.
Start from a spreadsheet or a document
Section titled “Start from a spreadsheet or a document”Instead of typing each task, above the task list:
- Import Excel / CSV: choose an .xlsx, .xls or .csv file, and choose which columns hold the Task text, Description and Section (the group name). You can review the tasks before you save. Using Google Sheets? Download it as .xlsx first (File → Download).
- Generate from SOP: pick one of your documents. Wikidoc finds the recurring tasks in it and adds them as draft tasks for you to review.
What happens next
Section titled “What happens next”Each assignee sees the checklist under My checklists when it’s due, with overdue ones marked. They tick off the tasks and submit it. Approvers find submitted checklists in the Review queue, and click Approve or Reject. A rejected checklist goes back to the assignee to finish.
Change a template
Section titled “Change a template”On the Templates tab, click ⋯ next to the template, then Edit. Make your changes and click Save Changes. Each save is a new version, shown next to its name (v2, v3…), and earlier versions are listed under Version history. Checklists already started keep the tasks they started with.
Only the person who created a template, its owners, and Admins can edit, archive or delete it.
To stop a checklist being due without losing its history, click ⋯, then Archive.
If something goes wrong
Section titled “If something goes wrong”“Give the checklist a title.” / “Add at least one task.” Fill in the title, and at least one task.
I don’t see + New checklist. Viewers can fill in checklists but can’t create them. Ask an Admin for the Editor role.
I see an Upgrade prompt. Checklists are on the Team plan. See Upgrade your organization to Team.