
Edit a process map
Add and connect steps, label decisions, organize steps into swimlanes and subprocesses, then check the map for gaps.
Whether Wikidoc drew your map or you started from a blank canvas, you can change every part of it: steps, connecting lines, decisions, lanes and notes. This article covers the canvas. To link documents, checklists and training to a map, see Attach files, checklists, training and people.
Add and connect steps
Section titled “Add and connect steps”The toolbar on the left of the canvas holds the shapes. To add one, click it and then click where it should go on the canvas, or drag it onto the canvas.
- Rectangle, Circle and Decision (a diamond) are at the top. Click ⋮ for more shapes, such as Document, Database, Delay and Manual Input.
- A new step is called New Step. Click it to rename it.
- To connect two steps, drag from one of the small dots on the edge of a step to another step.
To remove a step or a line, click it and press Delete or Backspace. Undo and redo are at the bottom left of the canvas.
Change a step
Section titled “Change a step”Click a step. A toolbar opens above the canvas:
- Shape: change what kind of shape it is.
- The step’s text.
- Text and fill colors: choose a color, or type a hex code.
- +: add a badge, such as Manual, Automated, Review, Approval, System or Critical.
- Task: turn the step into a task on a task board, for work the process still needs.
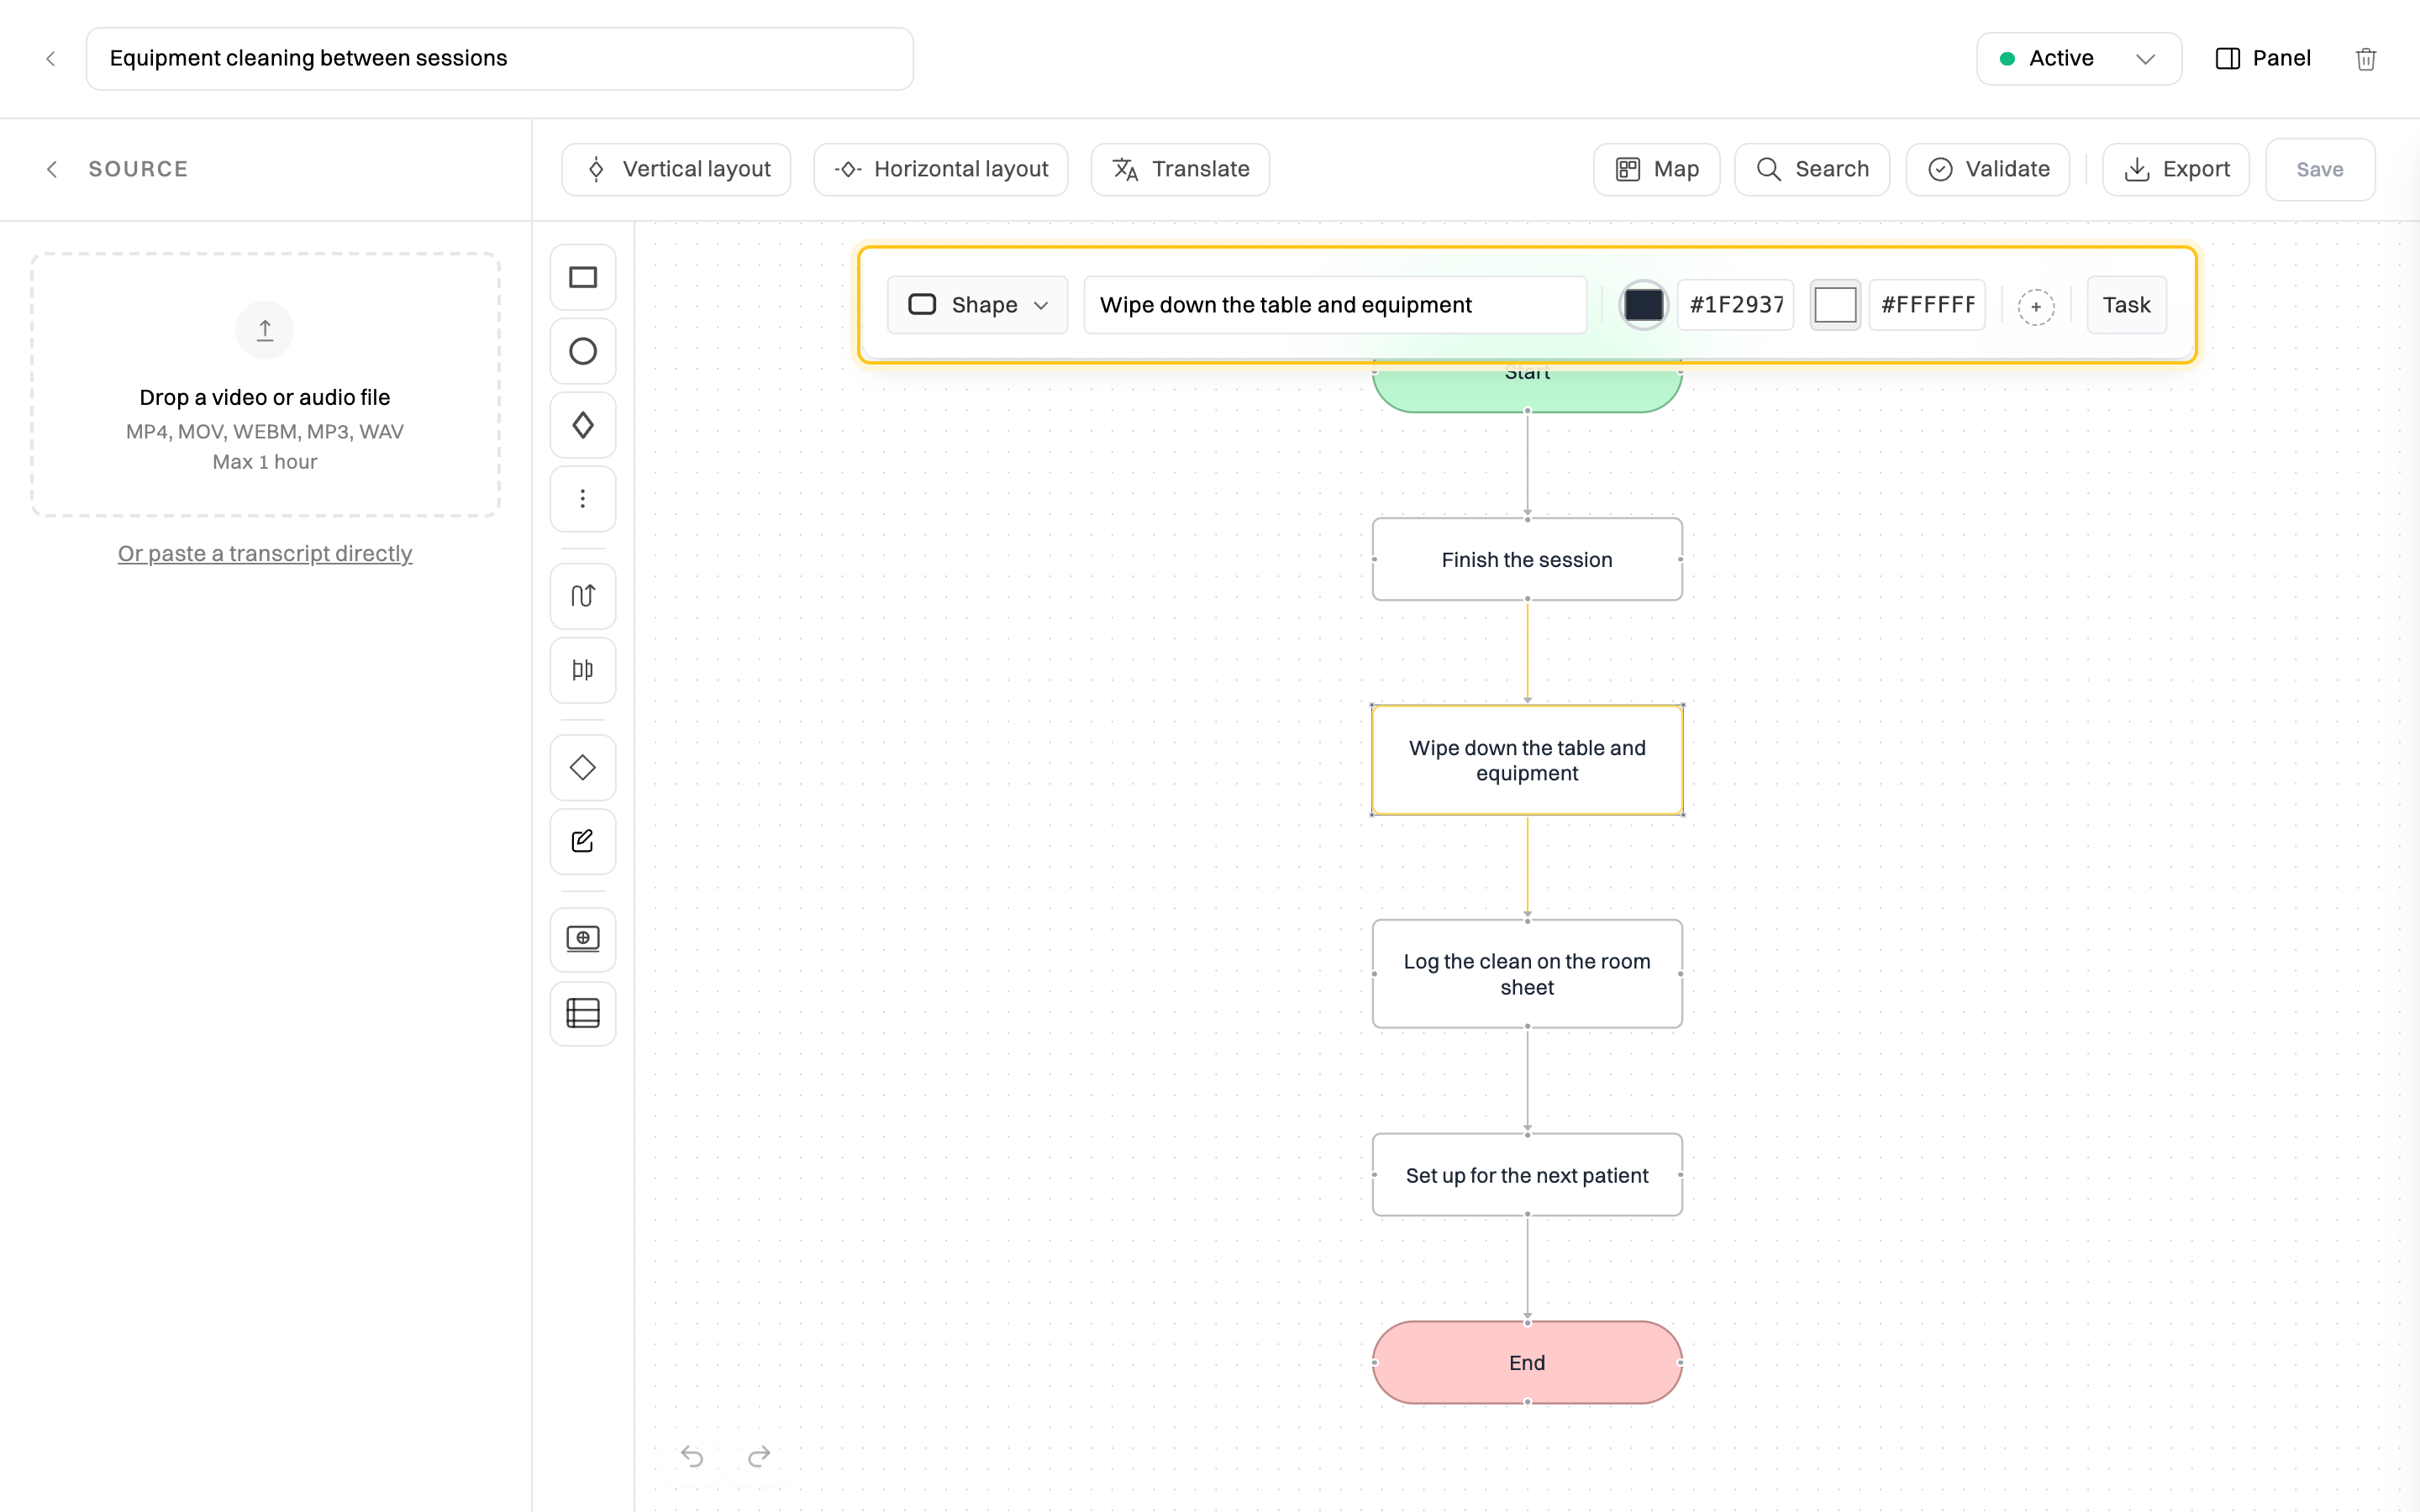
To change several steps at once, hold Shift and click each one. The button below the connection style lines up the selected steps (left, center, right, top or bottom).
Label a line
Section titled “Label a line”Double-click a line to change it. You can choose its color, make it dashed, dotted or animated, or give it text, such as Yes or No after a decision. Type the text and click Apply. Delete removes the line.
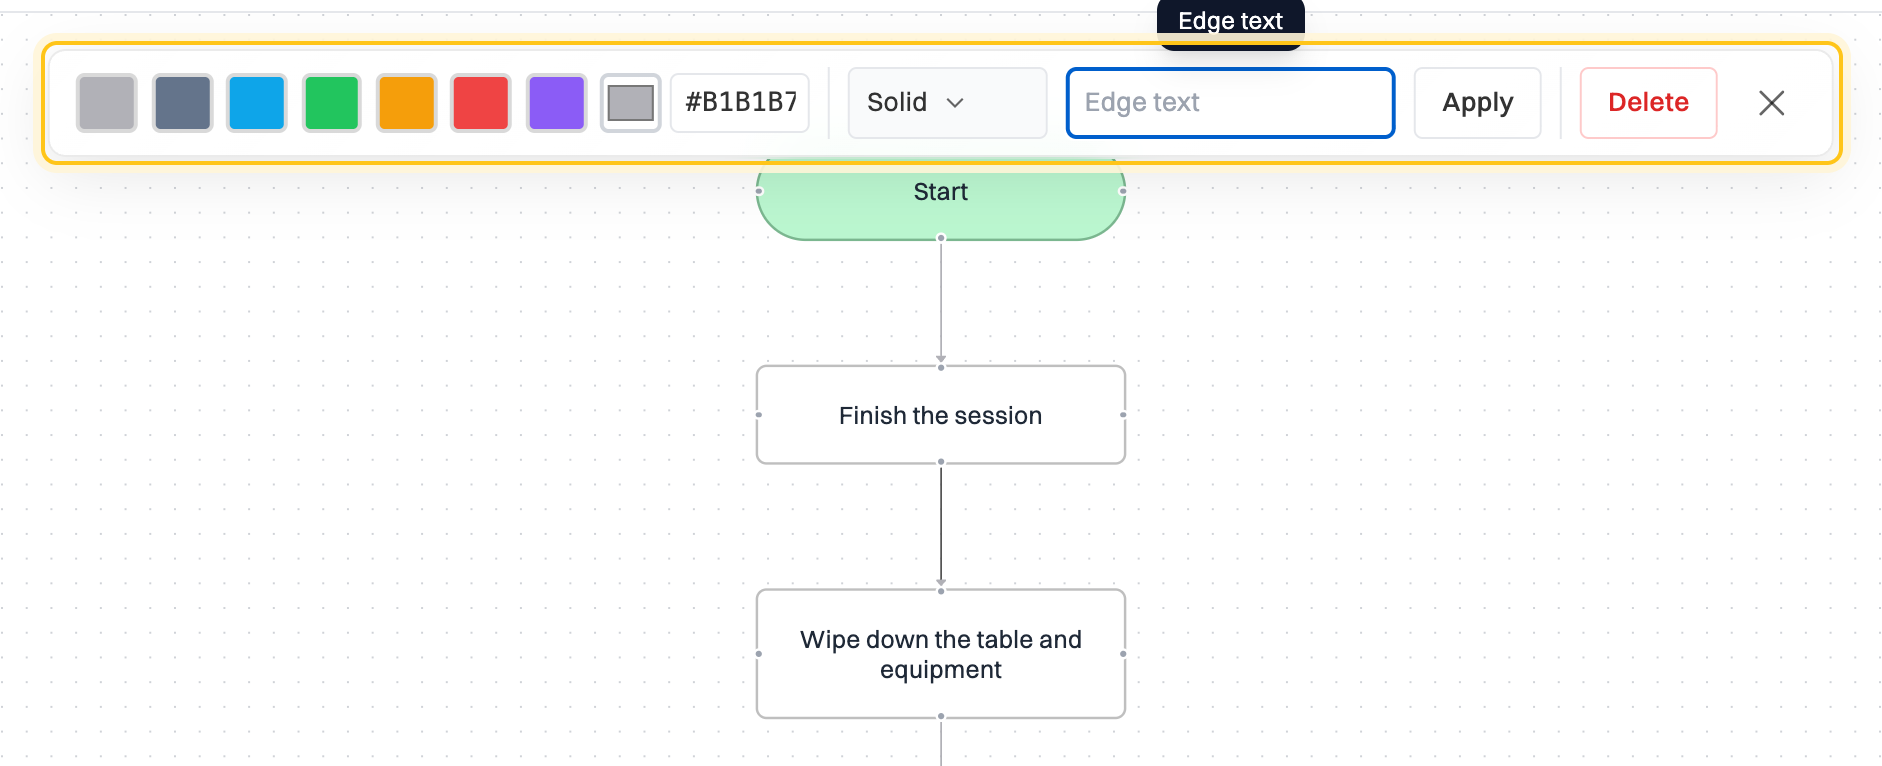
To change how every line is drawn, straight, stepped or with rounded corners, use the connection style button in the left toolbar.
Decisions and gateways
Section titled “Decisions and gateways”Use a Decision diamond where the process asks a question, and label each line out of it with an answer.
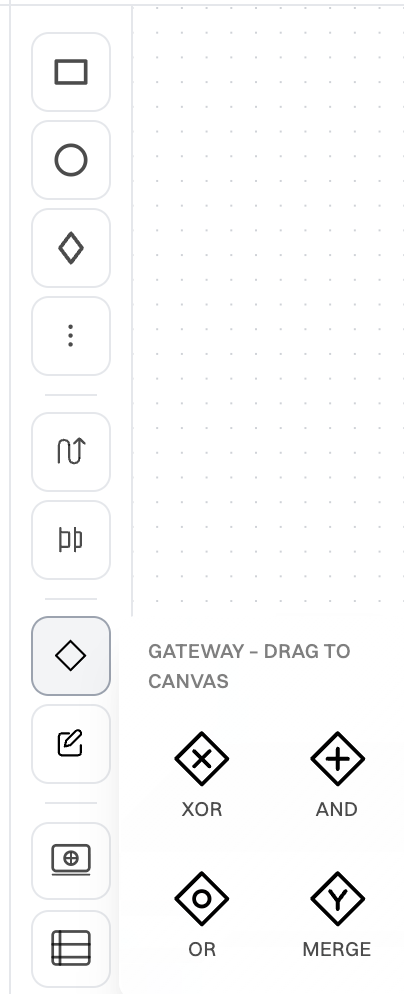
For processes where work splits and joins, the gateway button in the left toolbar has four gateways. Drag one onto the canvas:
| Gateway | Means |
|---|---|
| XOR | Exactly one of the paths out of it is followed. |
| AND | All the paths out of it happen, side by side. |
| OR | One or more of the paths out of it happen. |
| MERGE | Separate paths come back together here. |
Swimlanes
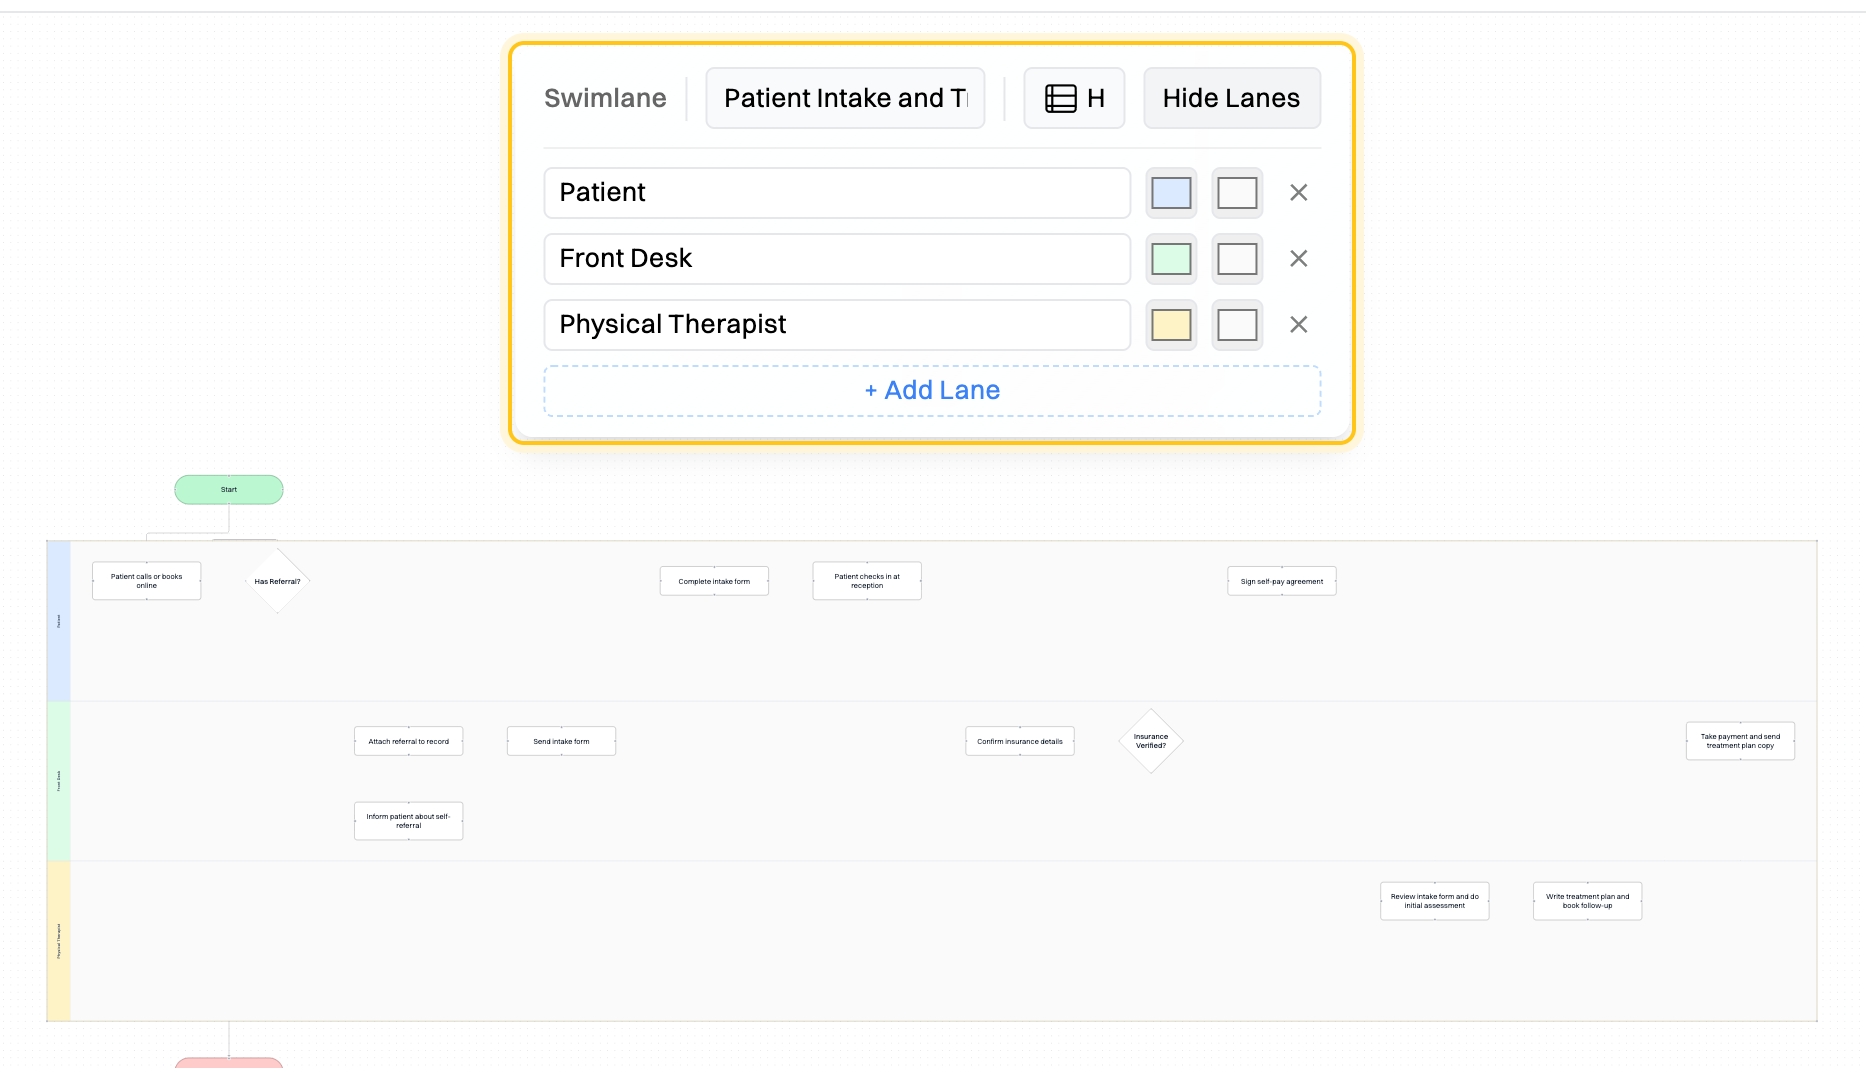
Section titled “Swimlanes”A swimlane gives each role or team its own band, so you can see who does each step. Maps Wikidoc draws from a description get one automatically when more than one role is involved.
- To add one, drag the swimlane button (the last one in the left toolbar) onto the canvas.
- To change its lanes, click the swimlane’s lane labels, then Edit Lanes. Rename a lane, change its colors, remove it with ×, or click + Add Lane. H switches the lanes between horizontal and vertical.
- Drag each step into the lane of whoever does it.
Subprocesses and notes
Section titled “Subprocesses and notes”- Subprocess: when a step is a whole process of its own, drag a subprocess onto the canvas and name it. Click its ⊕ button to open it as a map of its own, and draw the detail there. The name at the top of the page shows where you are; click the map above it to go back. Subprocesses don’t count toward the three process maps on the Free plan.
- Sticky note: drag a sticky note onto the canvas for a comment that isn’t a step.
Tidy up and find your way around
Section titled “Tidy up and find your way around”- Vertical layout and Horizontal layout rearrange the whole map, top to bottom or left to right.
- Map shows a small overview of a large map. Double-click an empty part of the canvas to fit the whole map on screen.
- Search finds a step by its text.
- Translate translates every step’s text into another language. Save the map to keep the translation.
Check the map
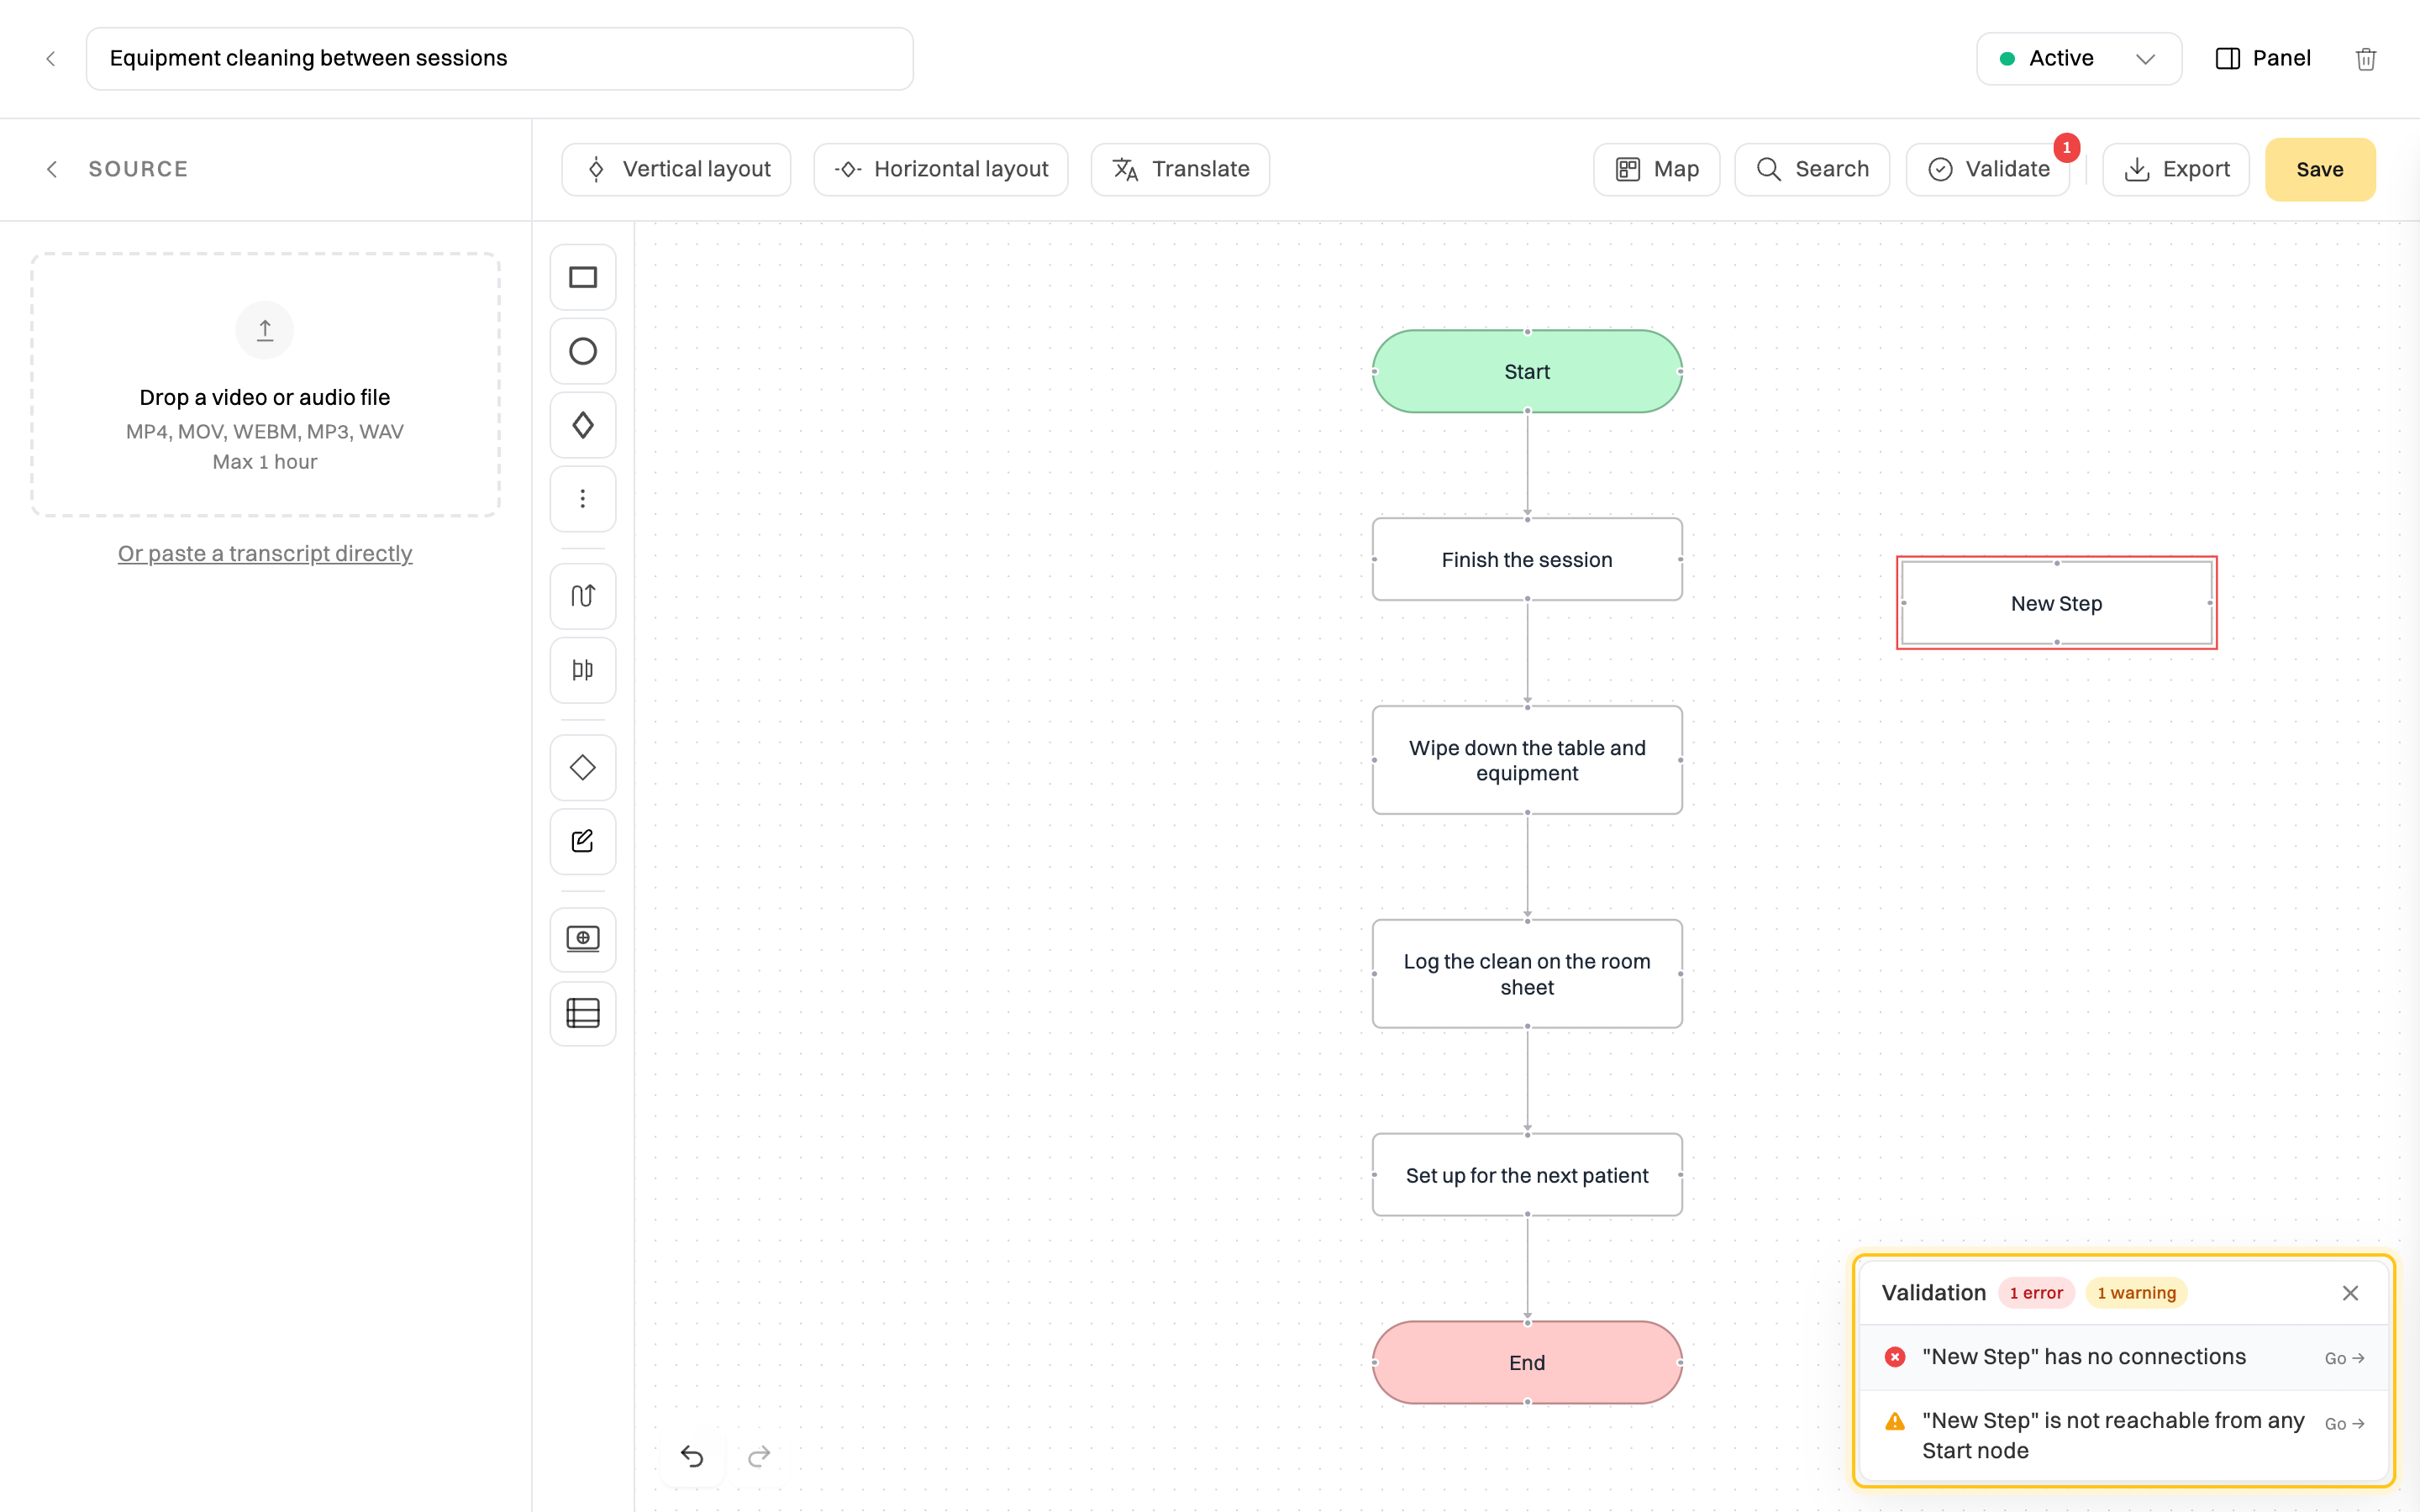
Section titled “Check the map”Click Validate. Wikidoc lists anything that looks wrong:
- A step with no lines to or from it.
- A decision or gateway with no way out, or only one.
- A step that can’t be reached from Start.
- No End.
Click Go → next to an item to jump to that step.
Save your changes
Section titled “Save your changes”Click Save, or press ⌘S (Ctrl+S on Windows). The button turns yellow when you have unsaved changes. On the Pro and Team plans, every save is kept as a version in the map’s Versions tab (click Panel).
If the map had been approved, saving a change means it needs approving again.