Build a client portal
Share training, guides, process maps and checklists with people outside your organization, on a branded page of their own.
A portal is a web page where people outside your organization, such as clients, partners, contractors or auditors, can read your guides and take your training. You choose exactly what’s on it, and it carries your name and colors. The people who use it are guests: they never take a seat. See Members vs. portal guests.
Create a portal
Section titled “Create a portal”-
Click Portal in the sidebar, then + New Portal.
-
Give it a title, and pick a template to start from:
- Blank: start from scratch.
- Certification Centre: training that ends in a certificate.
- Client Knowledge Base: guides, processes and reference material.
- Auditor Package: invite-only and watermarked, with signed acknowledgments.
- Onboarding Hub: steps to work through in order.
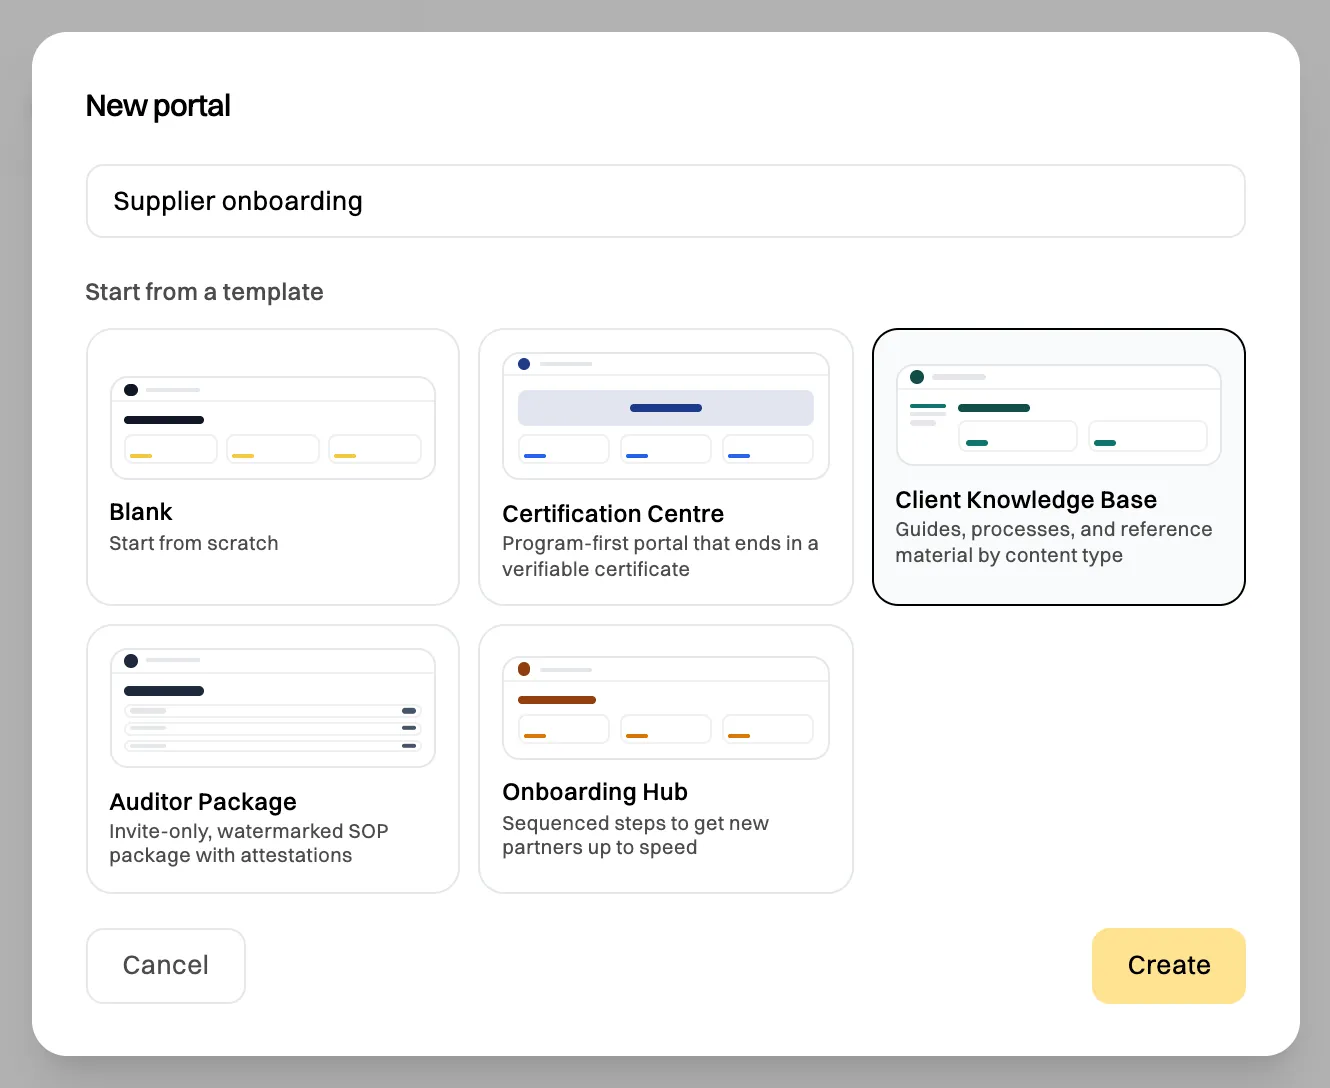
A template sets up sections and settings you can change. -
Click Create. The portal opens in the builder. Nobody else can see it until it’s published.
Add sections and content
Section titled “Add sections and content”The builder has three parts: the sections on the left, a live preview in the middle, and the settings on the right. Switch the preview between Desktop, Laptop, Tablet and Mobile to check how it looks.
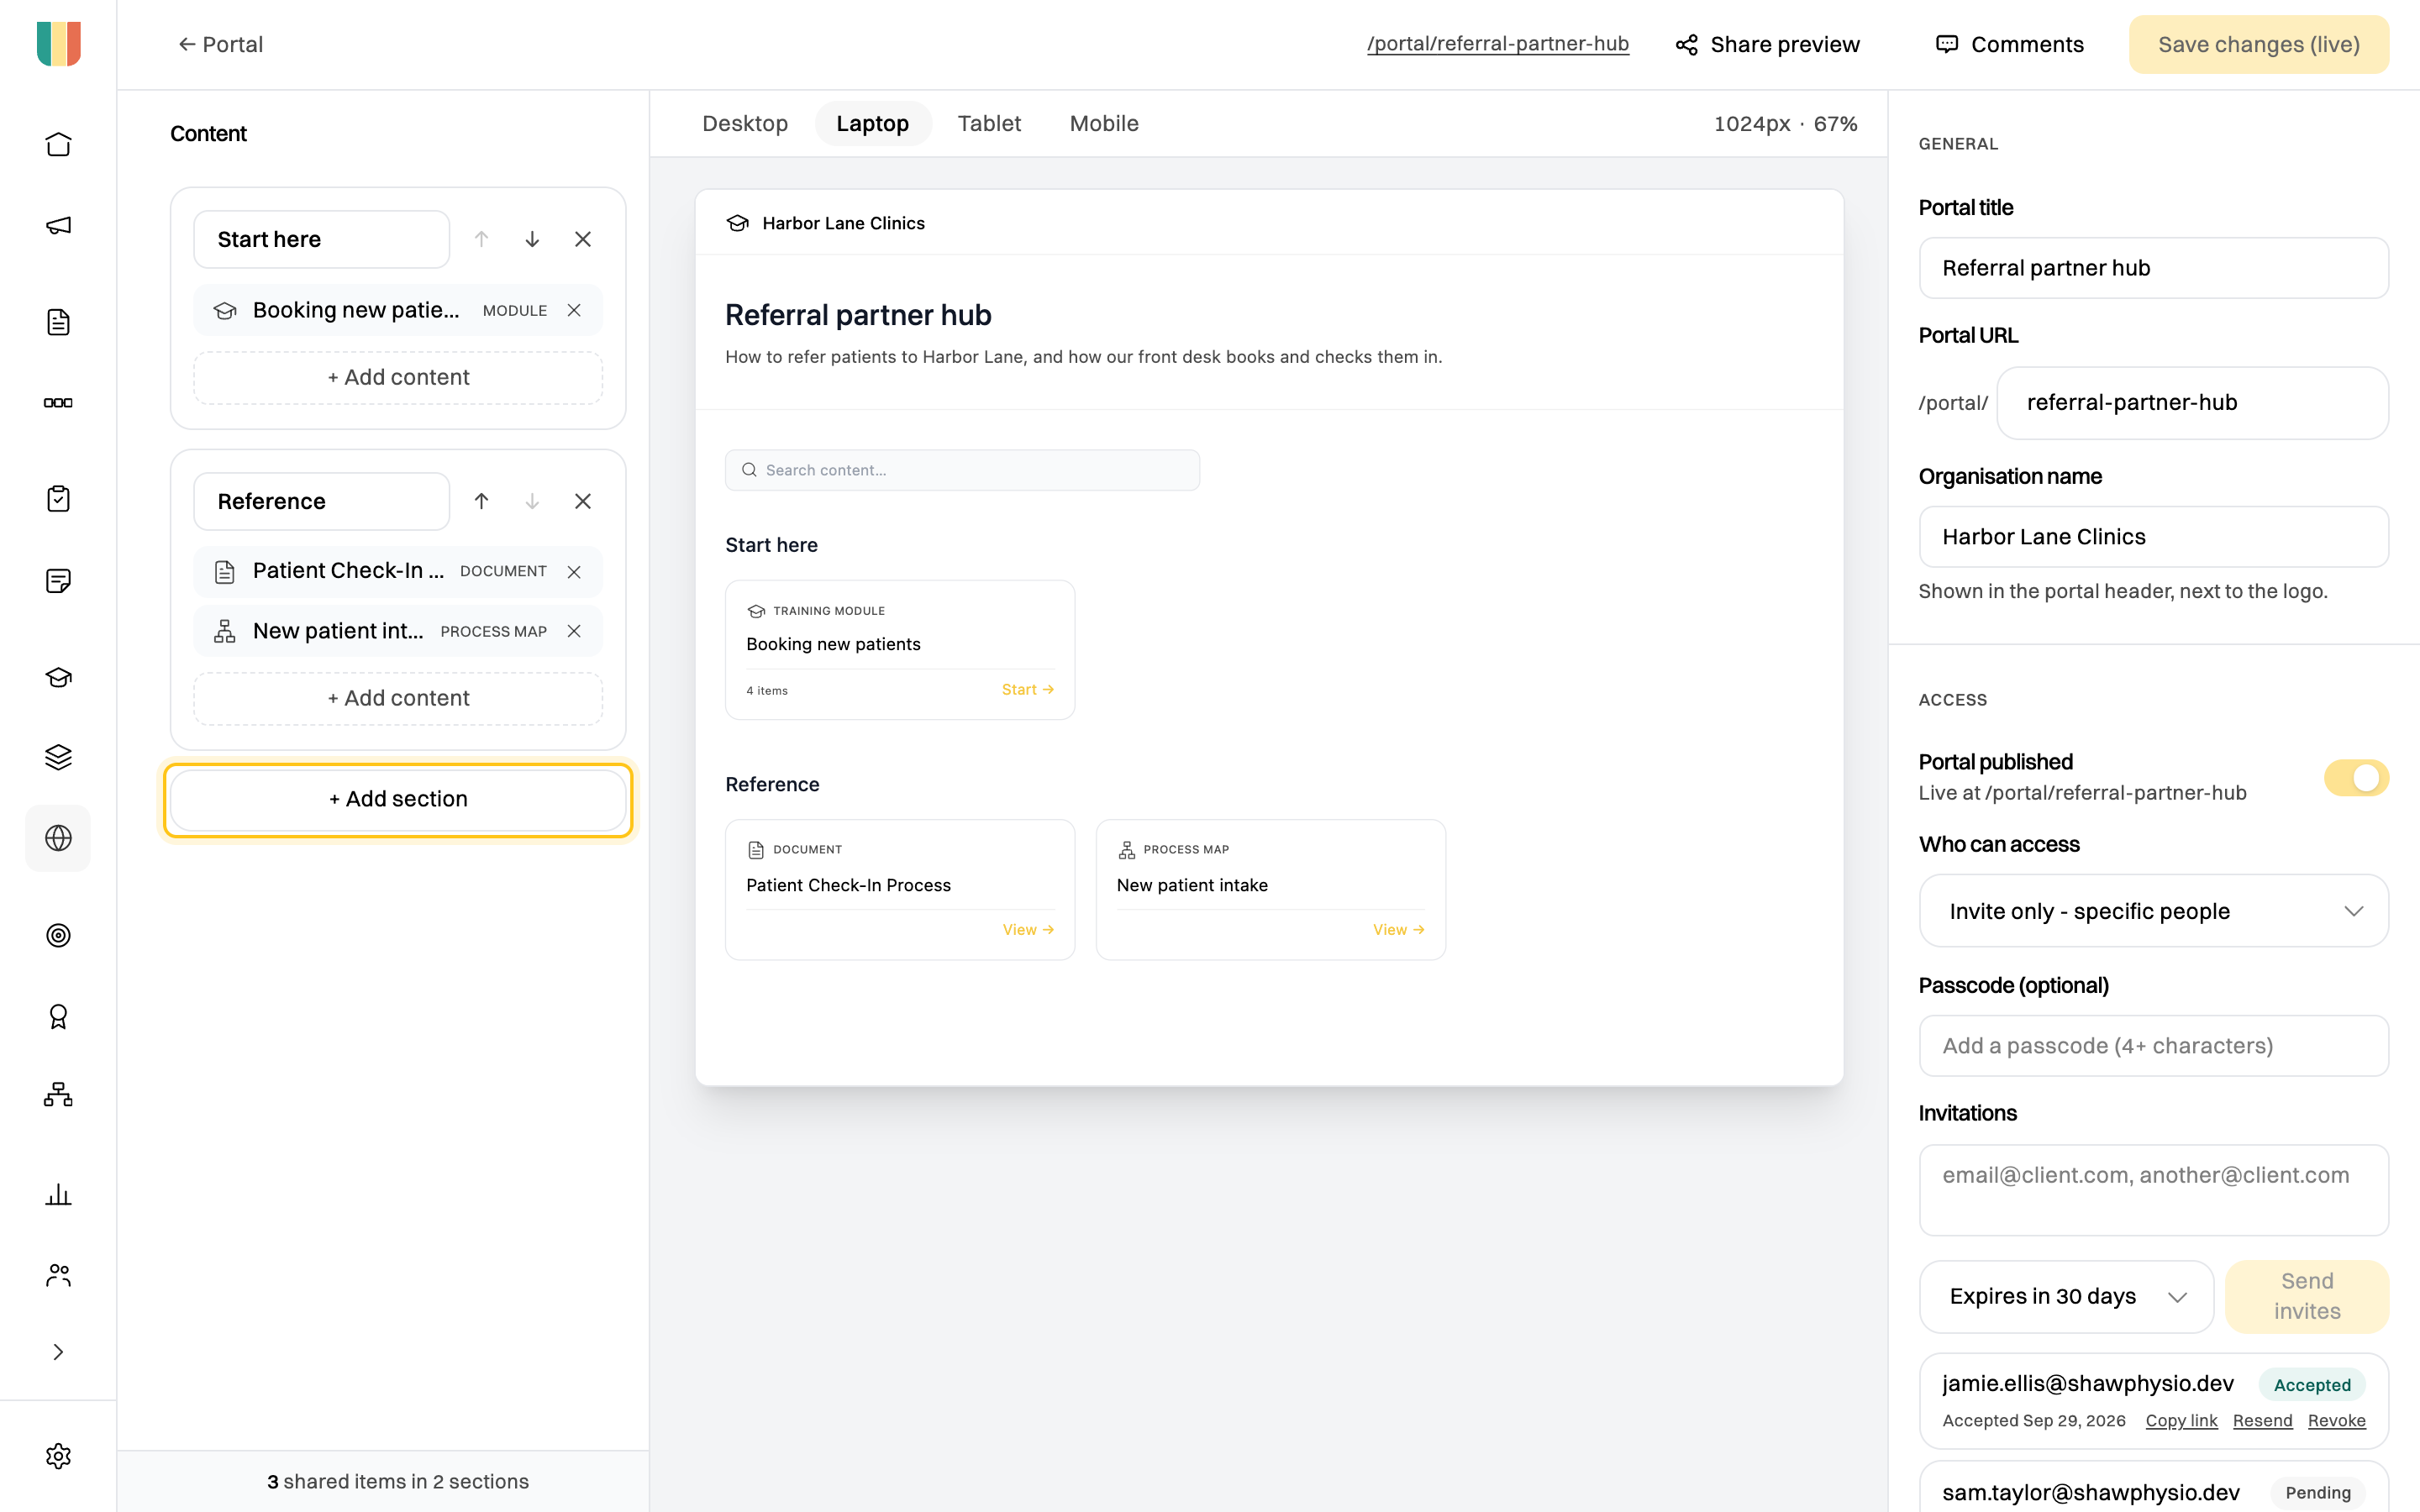
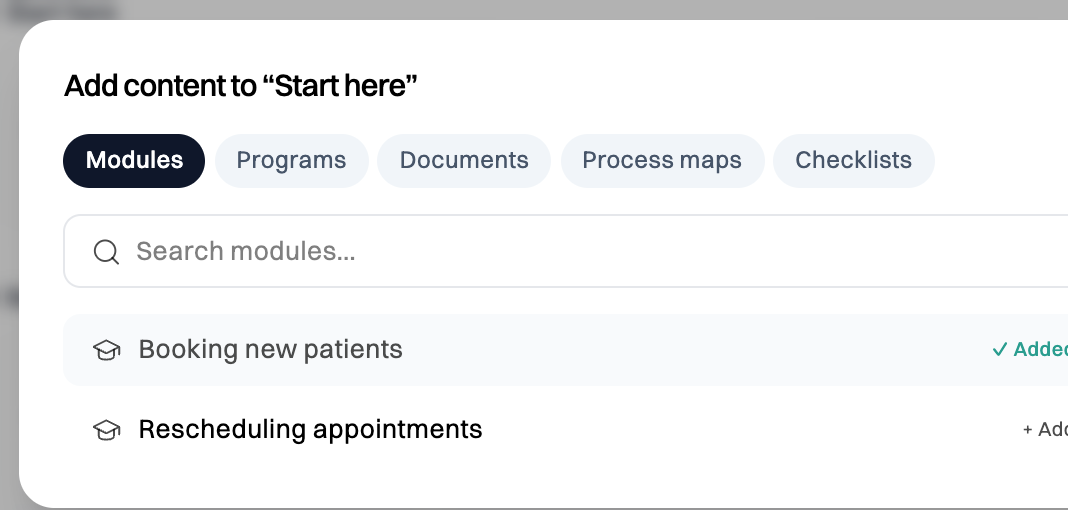
- + Add section adds a section. Give it a title, such as “Start here”, and use the arrows to move it up or down.
- + Add content adds to a section. Choose a tab (Modules, Programs, Documents, Process maps or Checklists), find what you want and click + Add.
- ✕ removes a section or an item. It only takes it off the portal; the original isn’t touched.
The portal always shows the current version of what you add, so when you update a guide, the portal updates too.
Brand it
Section titled “Brand it”In the settings on the right:
- Portal title and Portal URL: the address is
/portal/followed by what you type here. - Organisation name: shown in the portal’s header, next to your logo, and on certificates guests earn there.
- Appearance: a Layout (Classic, Hero centred, Sidebar nav or List), a Font, and the Accent colour and Heading colour.
- Hero: the banner at the top, with a Cover image, a Hero title and a Description.
- Header & footer: a Logo, Footer text, and Hide “Powered by Wikidoc”.
Images can be PNG, JPEG or WebP, up to 2 MB each.
Protect the content
Section titled “Protect the content”Under Content protection:
- Discourage saving & printing blocks right-clicking, printing and downloading videos in the portal.
- Watermark content puts each viewer’s email address and the date over what they see.
These discourage copying; they can’t stop someone photographing their screen.
Save your work
Section titled “Save your work”Click Save draft. When it’s ready, publish it and choose who can open it. See Publish a portal and track activity.
Get feedback before you publish
Section titled “Get feedback before you publish”Admins can click Share preview to create a link to the draft, valid for 7 days. Anyone with the link can see the portal and leave comments without signing in. Comments appear under Comments in the builder, with a count of those not yet resolved.