
Edit a document: text, steps and images
Change the wording and steps, and crop, highlight, blur or replace screenshots.
A generated document is a first draft. Read it through, fix anything the recording didn’t make clear, and hide anything private in the screenshots before you share it.
Open a document
Section titled “Open a document”Click Files in the sidebar, then click the document. It opens in the editor, with its narrated video, slides and quiz, if it has them, above the document itself.
Edit the text
Section titled “Edit the text”Click anywhere in the document and type. The toolbar above it has:
- Undo and Redo
- H for headings, B for bold and I for italic
- Bullet list, Numbered list and Checklist
- Insert link, Highlight text, Insert table and Insert image
Shortcuts: ⌘B for bold, ⌘I for italic and ⌘K for a link (Ctrl instead of ⌘ on Windows).
Each step is an item in a numbered list, so a new line in the list becomes a new step, and the numbers update when you delete one. To add a picture of your own, click Insert image and choose an image file.
Change a screenshot
Section titled “Change a screenshot”Click a screenshot to see what you can do with it.
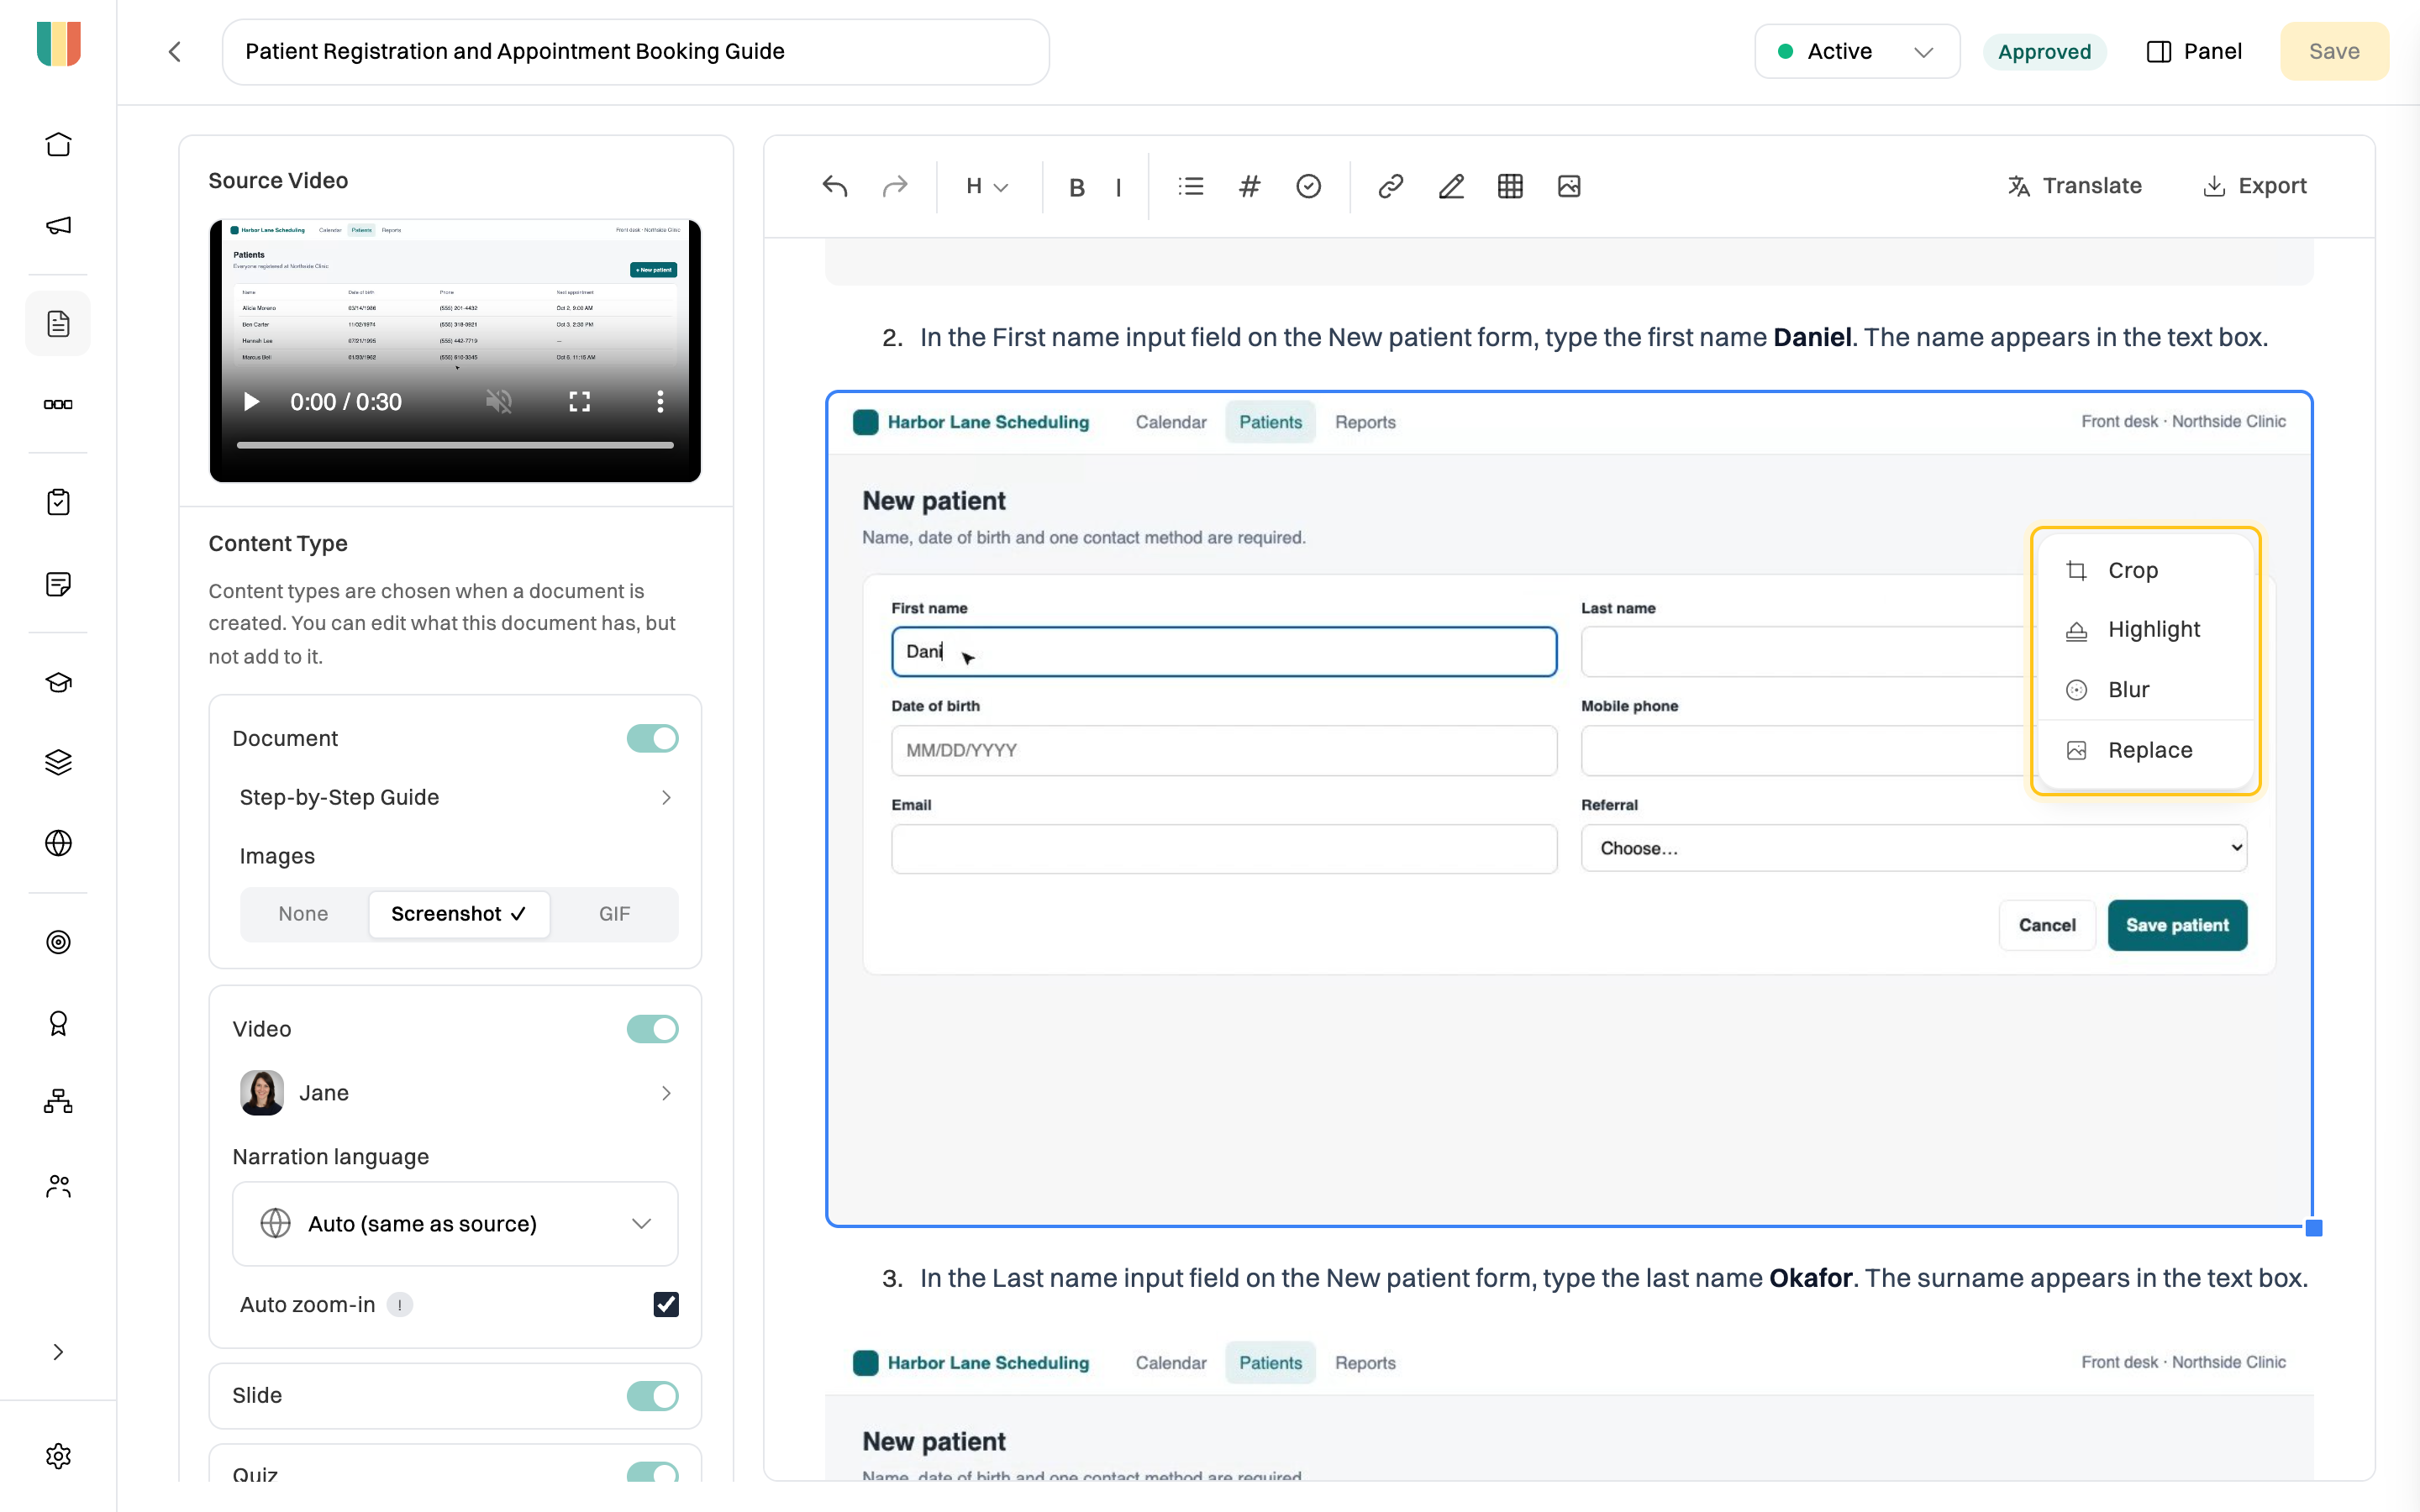
- Crop: drag to select the part to keep.
- Highlight: click to place a circle around what matters, such as a button. Set its size, opacity and color.
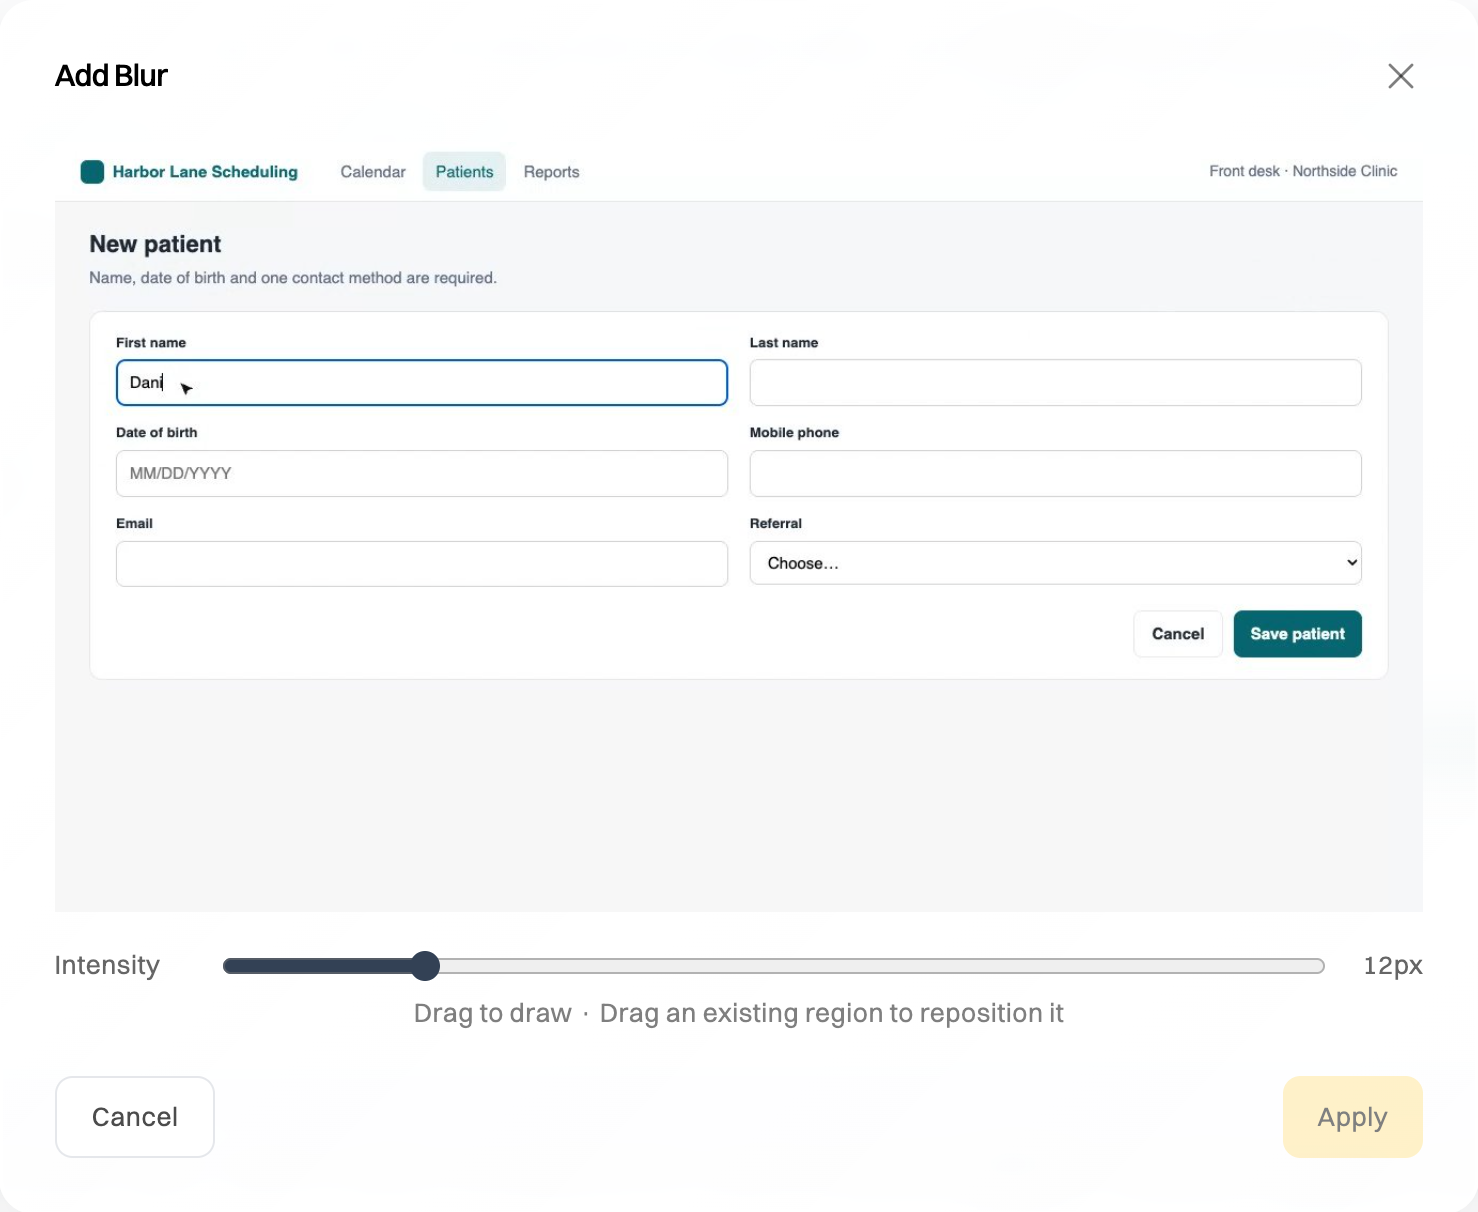
- Blur: drag over anything private, such as a name, email address or account number. Set how strong the blur is with Intensity.
- Replace: pick a different moment from the recording. Drag to the frame you want, then click Replace.
Click Apply to keep a change, or Cancel to leave the screenshot as it was.
Rename it
Section titled “Rename it”Click the title at the top of the editor, type the new name and press Enter. Or, in Files, click ⋯ next to the document, then Rename title.
Save your changes
Section titled “Save your changes”Click Save at the top right, or press ⌘S (Ctrl+S on Windows). Each save also keeps a copy of the document as it was, so on Pro and Team you can go back to it. See Document governance.
If you leave with unsaved changes, Wikidoc asks whether to save them.
Saving changes the content that was approved, so an approved document goes back to Not submitted and needs approving again. While you have unsaved changes, the Approved badge at the top says clears on save. See Request and give approval on a document.